Google Consent Mode v2 Implementation
If you use legacy tags, such as ga.js, analytics.js, or conversion.js, update to gtag.js or Google Tag Manager.
1. What is Consent Mode?
Consent Mode allows you to communicate your users' consent status regarding cookies or app identifiers to Google. It helps align Google services' behaviour with user preferences, either through automatic consent prompts or user consent interactions.
2. Consent Dialog Setup in the Clickio Platform
2.1. General Dialog Setup
Setup a consent dialog for your site. Follow these instructions to customize design, texts and various settings.
Clickio Consent offers two types of the consent dialog:
- TCF Mode (Sites with Advertising). Required for sites using advertising services like Clickio or Google AdSense. This mode ensures compliance with the Transparency and Consent Framework, managing user data in line with advertising requirements.
- Non-TCF Mode (Sites with no Advertising). For sites that do not serve ads and do not require adherence to the TCF. Enjoy simplified purposes and descriptions for user consent, streamlining compliance without the complexities of advertising regulations.
The default text disclosures and Google vendor settings in both the TCF and Non-TCF modes are designed to comply with Google Consent Mode requirements, and we recommend to use them. If you opt to customise these settings, ensure that the following requirements are met:
- The initial disclosure text explains that the data is collected for the purpose of personalizing and measuring the effectiveness of advertising.
- Google is added as a vendor and its privacy policy URL is set as https://business.safety.google/privacy/.
2.2. Enable Consent Mode v2
Make sure that the Consent Mode v2 setting is enabled (it is enabled by default for all new consent setups). To enable Consent Mode v2 in the Clickio platform, navigate to the consent settings "Consent > yoursite.com > Settings" and enable the "Google Consent Mode v2" option. This ensures that Google services align with your users' consent choices. After enabling, you must complete the necessary steps to implement Consent Mode on your site correctly. These steps are crucial for the proper functioning of Consent Mode and are detailed in the following section.

3. Install Clickio Consent Main Tag and set default Consent Mode Config
You can install the Clickio Consent tag and the default Consent Mode config in two ways:
- Option 1 - Using Google Tag Manager
- Option 2 - Using on-page code placement
- Option 3 - Using a CMS Plugin
Both options are described below.
3.1. Option 1 - Using Google Tag Manager
3.1.1. Install Clickio Consent Template in Google Tag Manager
Access the Google Tag Manager Account
- Log in to GTM: Go to Google Tag Manager and log in to your account.
- Select a Container: Choose the relevant container for the website where you want to manage consent.
Install the Clickio Consent Template
Create a Tag Using the Template
-
Create a New Tag: Go to the “Tags” section in your container and click on “New” to create a new tag.
-
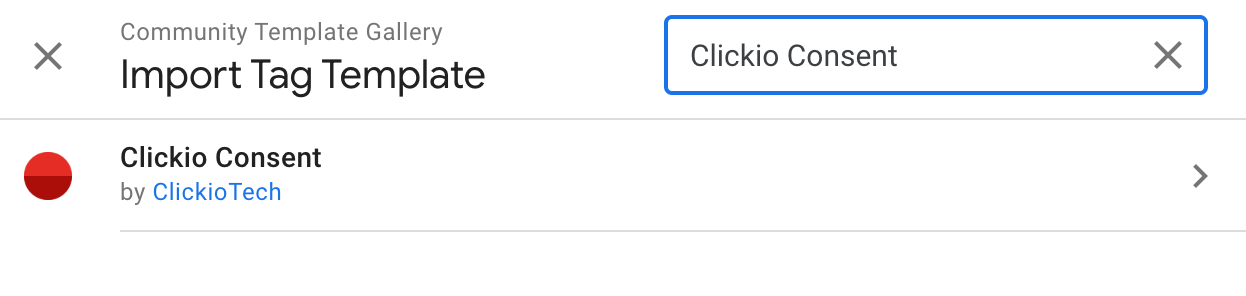
Select the Clickio Consent Template:
- Click on “Tag Configuration” and select “Clickio Consent” from the list of available tag templates.
- Change tag name from "Untitled Tag" to “Clickio Consent”
-
Set Up the Trigger:
-
-
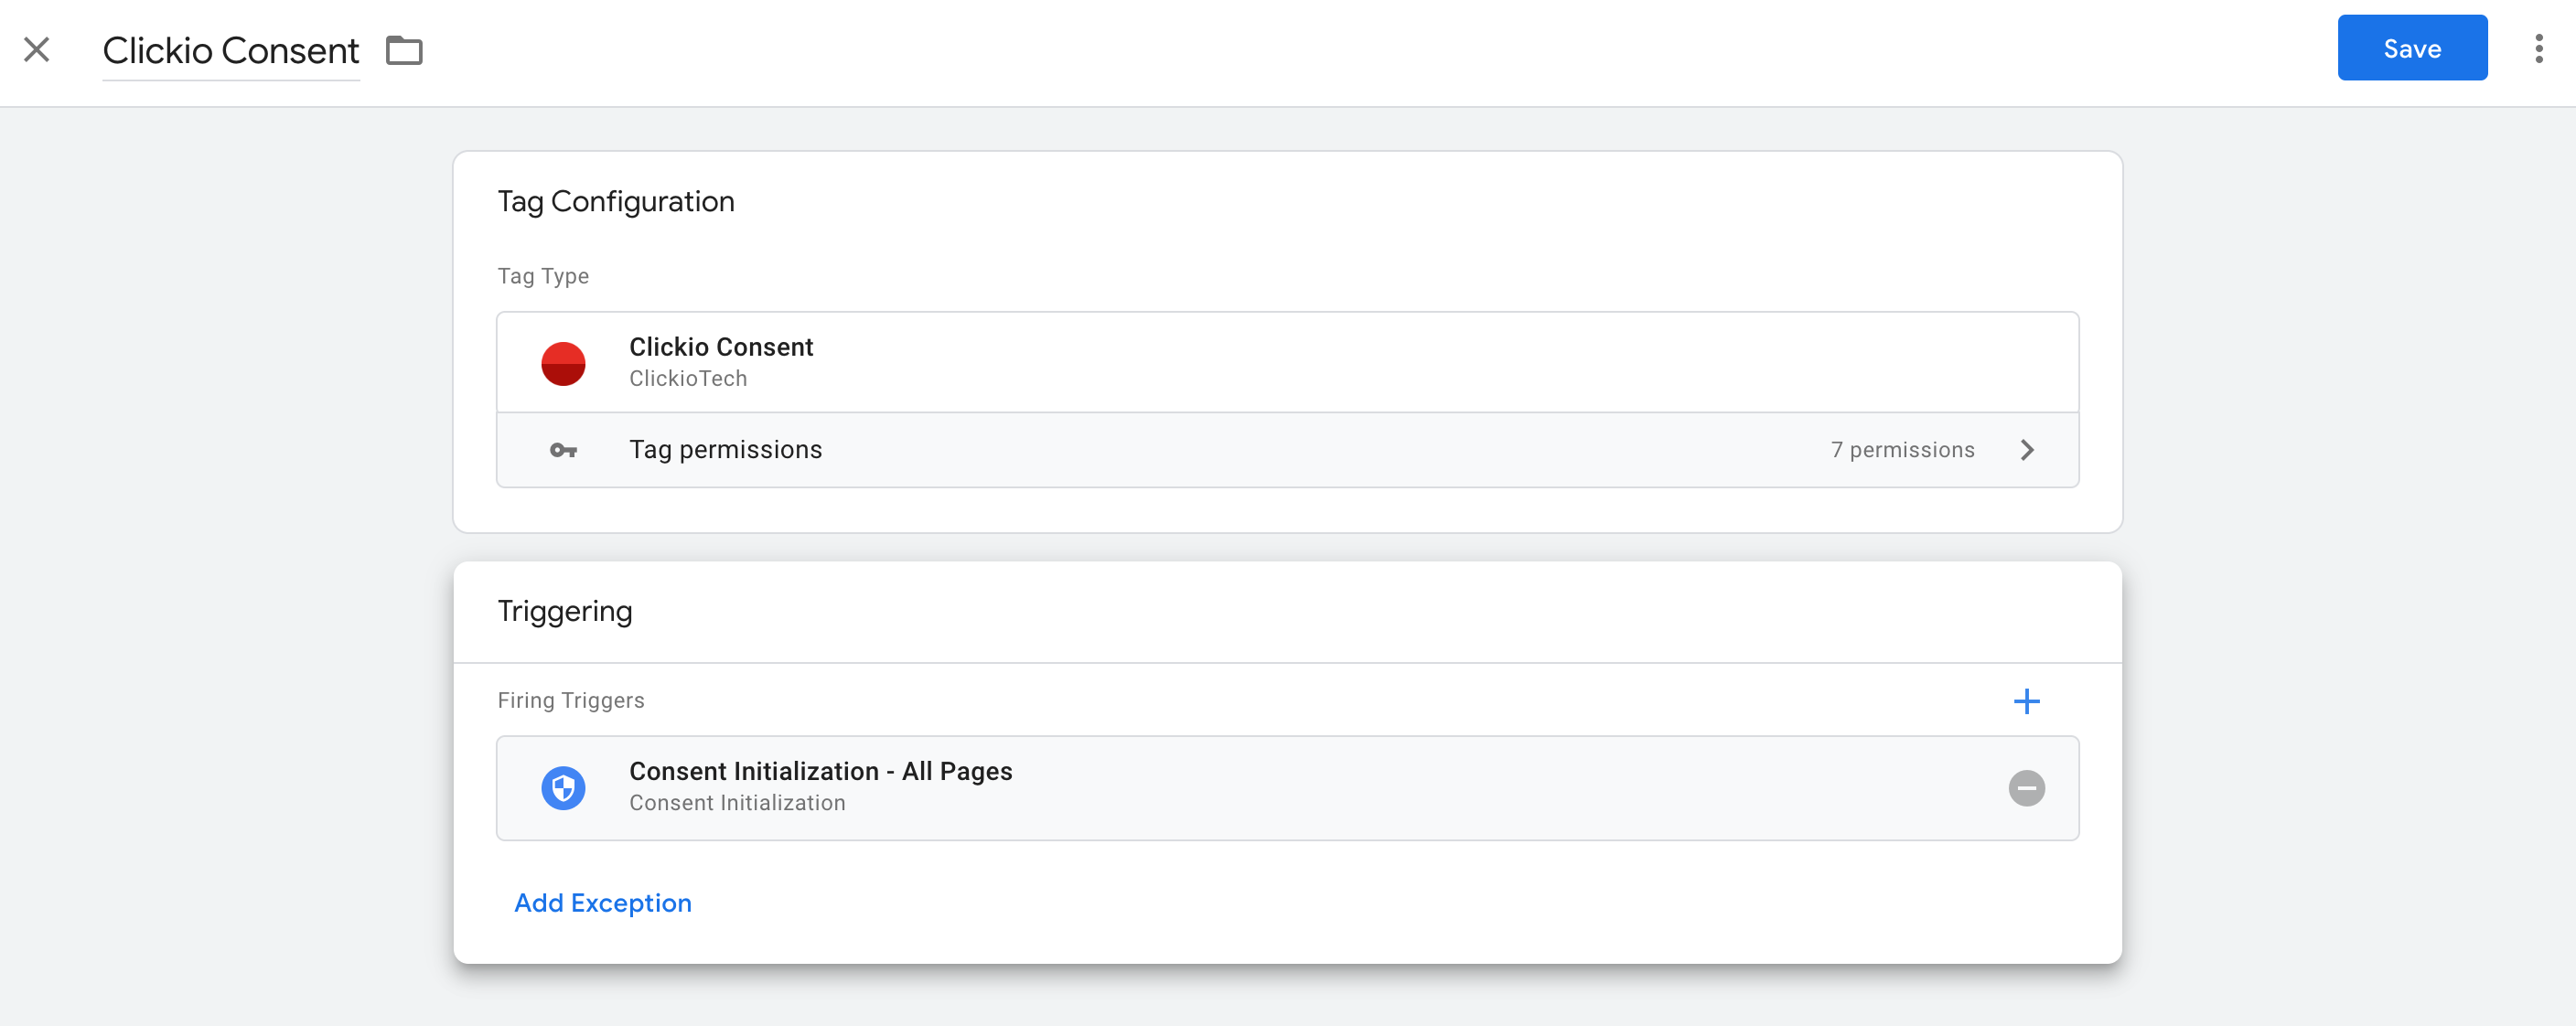
- In the same tag configuration window, click on “Triggering” and choose an existing internal trigger "Consent Initialization - All Pages" or create a new trigger based on the "Consent initialization" event type.
- Please do not use triggers based on the "Page View" or "Initialization" event types. Read more about Page View triggers.
-
-
- Save the Tag: Save the tag after selecting the appropriate trigger.
3.1.2. Enable Clickio CMP Main Code
Please skip this step if you have already installed the main code directly
You can also install the main code directly and use the GTM template to manage the default config only
-
Access the Template: Go to the "Tags" section within your GTM container, then click the previously created "Clickio Consent" tag.
-
Enable Clickio CMP:
- Check the box labeled "Enable Clickio CMP" to automatically include the Clickio CMP code on your page.
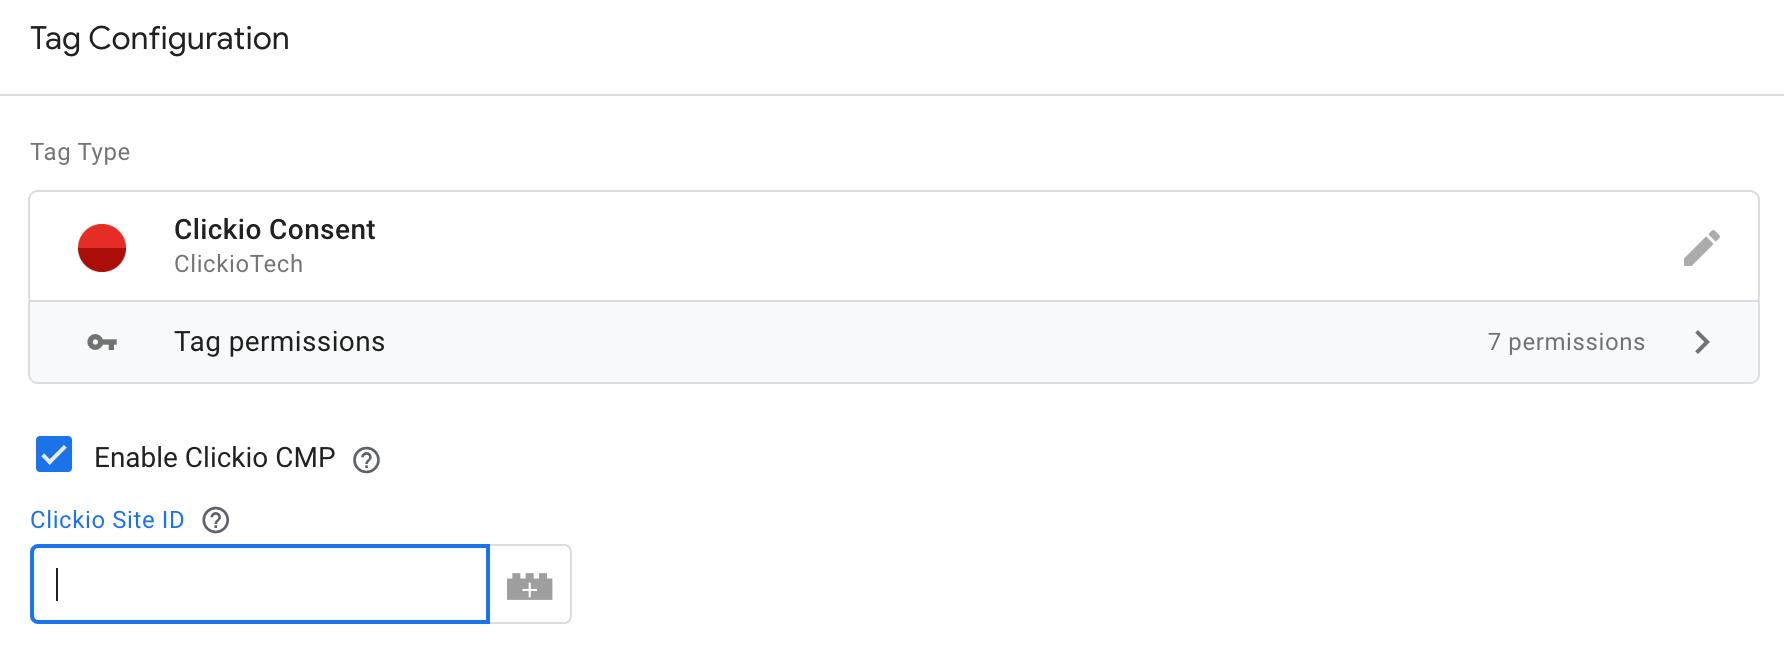
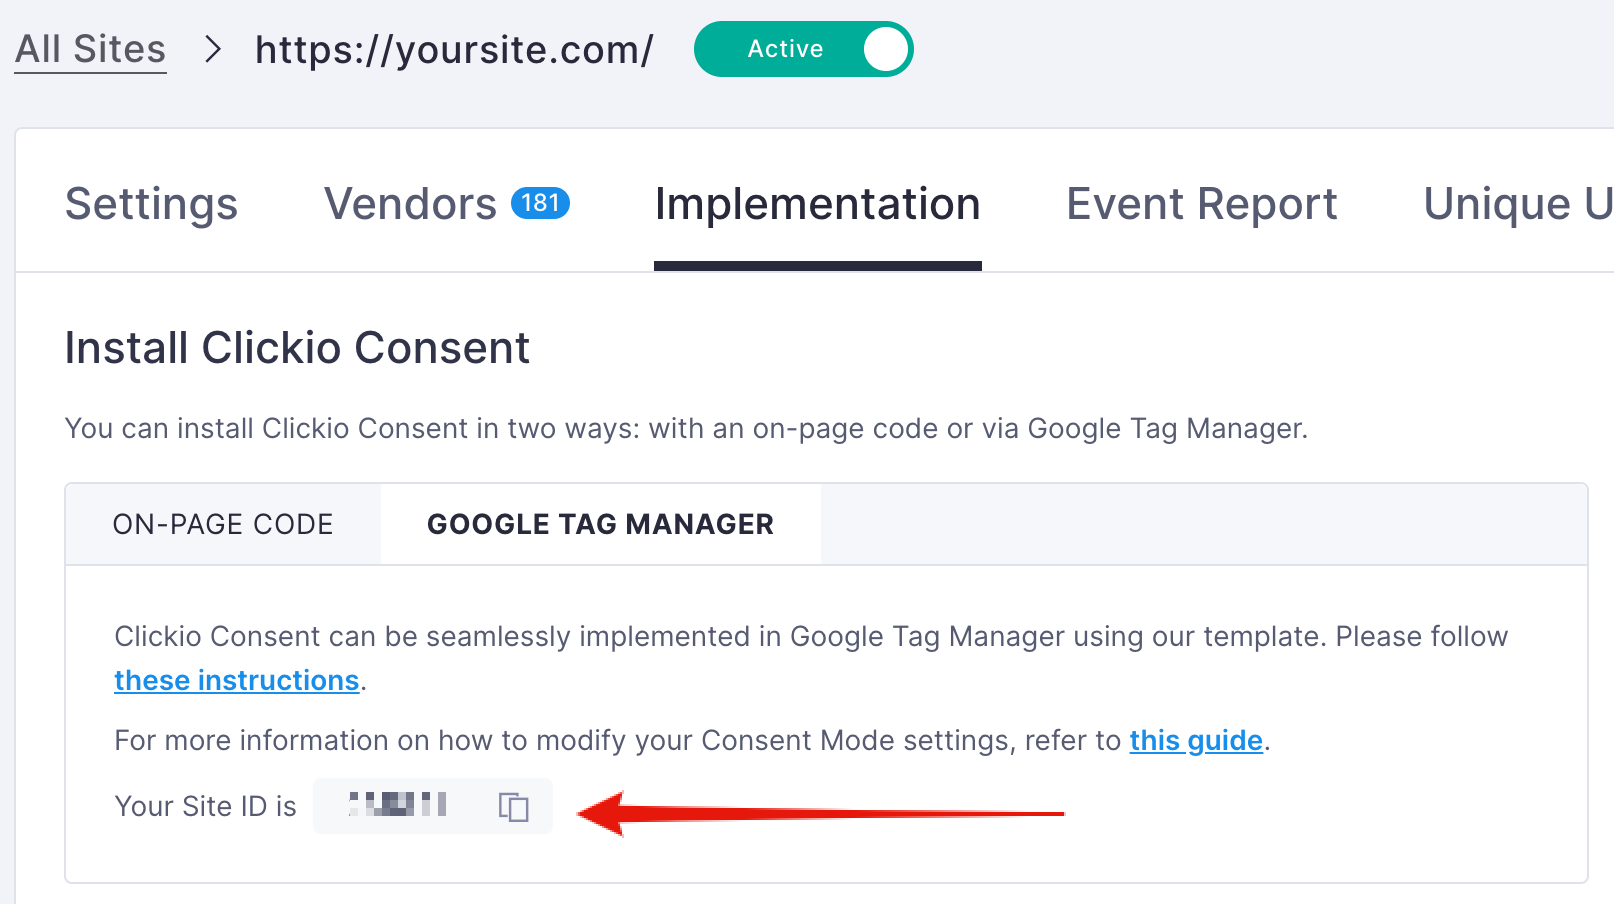
- Enter your Clickio Site ID. You can find the Site ID in the Clickio platform under "Consent > yoursite.com > Implementation > Google Tag Manager".
- Check the box labeled "Enable Clickio CMP" to automatically include the Clickio CMP code on your page.
-
Save the Tag: Once configured, save your tag by clicking "Save".


3.1.3. Consent Mode Configuration
In the Google Tag Manager (GTM) template settings for Clickio Consent, you can configure Google Consent Mode v2. This section provides you with the flexibility to set up default consent states and update them based on prior user choices. The template includes several parameters that allow you to adjust consent scope, apply region-specific settings, and more.
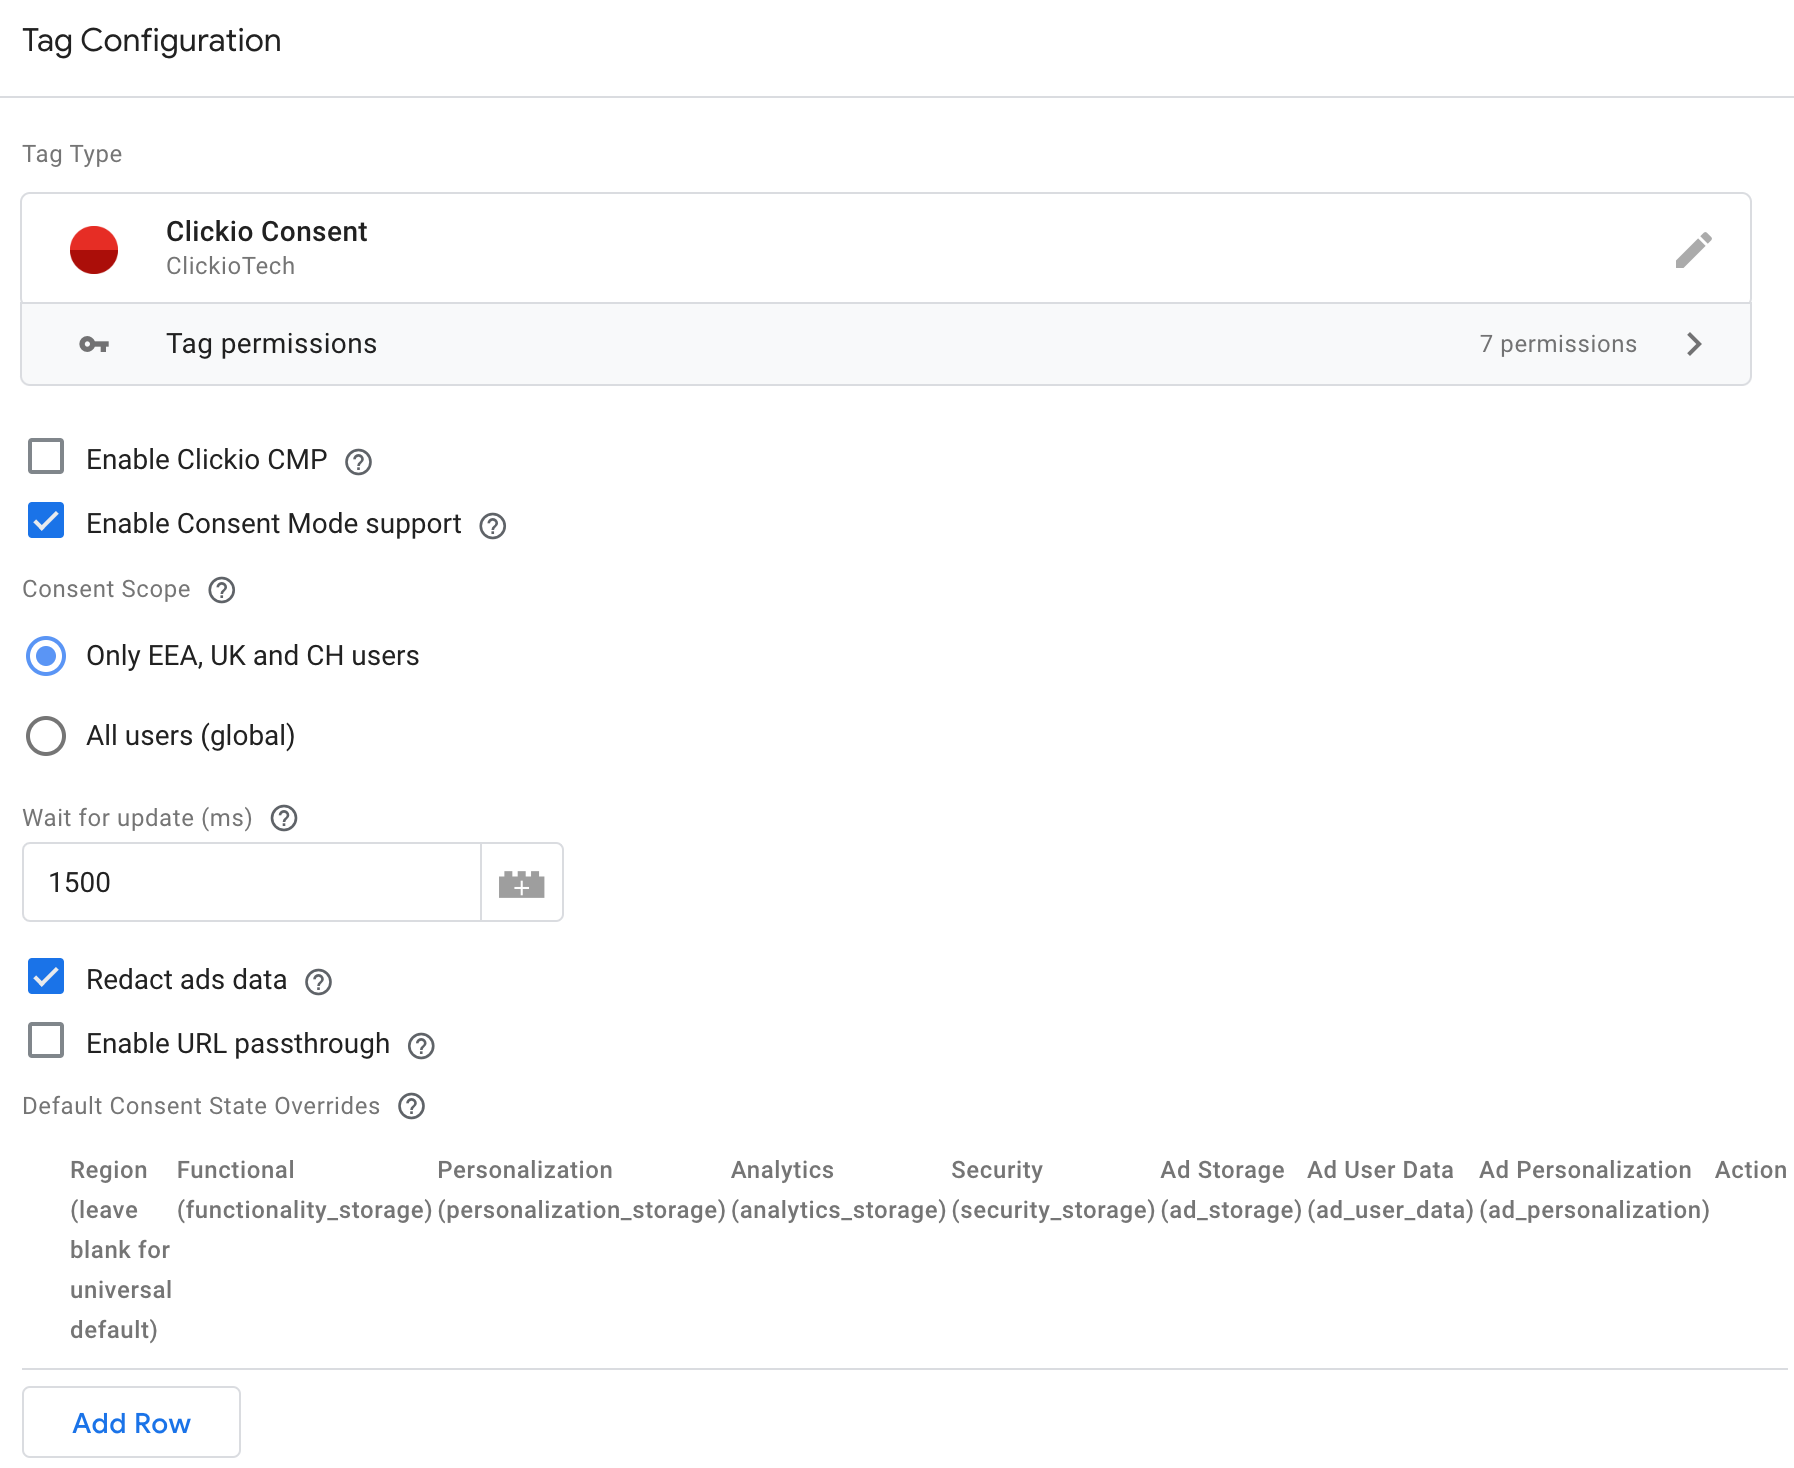
- Enable Consent Mode Support: This checkbox enables the GTM template to set default consent states and update them based on previous decisions made through the Clickio CMP.
This option functions correctly only when the 'Enable Consent Mode support' feature is activated in the Clickio Consent settings UI.
-
Consent Scope: This radio button allows you to choose between two scopes:
- Only EEA, UK, and CH users: Applies strict "denied" defaults to users in the European Economic Area, United Kingdom, and Switzerland, while users in other regions will have a general default of "granted".
- All users (global): Applies "denied" defaults to all users universally.
Make sure this setting matches the equivalent setting in the "Consent > yoursite.com > Settings > Consent Scope" section of Clickio Platform to avoid any conflicts.
- Wait for update (ms): This setting determines how long, in milliseconds, the Google tags should wait before attempting to update the user's consent state. This delay provides a buffer to ensure that any necessary consent changes are effectively captured, helping maintain alignment with user preferences. Read more.
- Redact ads data: This checkbox allows you to redact ad click identifiers sent in network requests by Google Ads and Floodlight tags when ad storage is denied. Read more.
- Enable URL Passthrough: This checkbox enables ad click, client ID, and session ID information to be passed through in URLs. Read more
-
Default Consent State Overrides: This parameter table allows you to specify alternative default consent states for specific regions using ISO-3166-1 alpha-2 codes. It also allows you to define a general default consent state for all users not covered by specific region-based settings. The table includes columns for the following:
-
Region (leave blank for universal default): Specify the region for the consent override using ISO-3166-1 alpha-2 codes. You can include multiple countries, separated by commas, such as
ES, GB. Leave blank to apply rule as universal default. - Functional (functionality_storage): Enables storage for the website or app's functionality, such as language settings.
- Personalization (personalization_storage): Enables storage related to personalization, such as video recommendations.
- Analytics (analytics_storage): Enables storage related to analytics, such as visit duration.
- Security (security_storage): Enables storage related to security, such as authentication and fraud prevention.
- Ad Storage (ad_storage): Enables storage related to advertising.
- Ad User Data (ad_user_data): Sets consent for sending user data to Google for online advertising.
- Ad Personalization (ad_personalization): Sets consent for personalized advertising.
-
Region (leave blank for universal default): Specify the region for the consent override using ISO-3166-1 alpha-2 codes. You can include multiple countries, separated by commas, such as
If you are implementing custom Default Consent State Overrides, please contact Clickio support to ensure these are supported in your instance of Clickio Consent; otherwise, they may be overwritten during Clickio CMP initialization.
Once configured, save your tag by clicking "Save".
3.1.4. Publish Changes
-
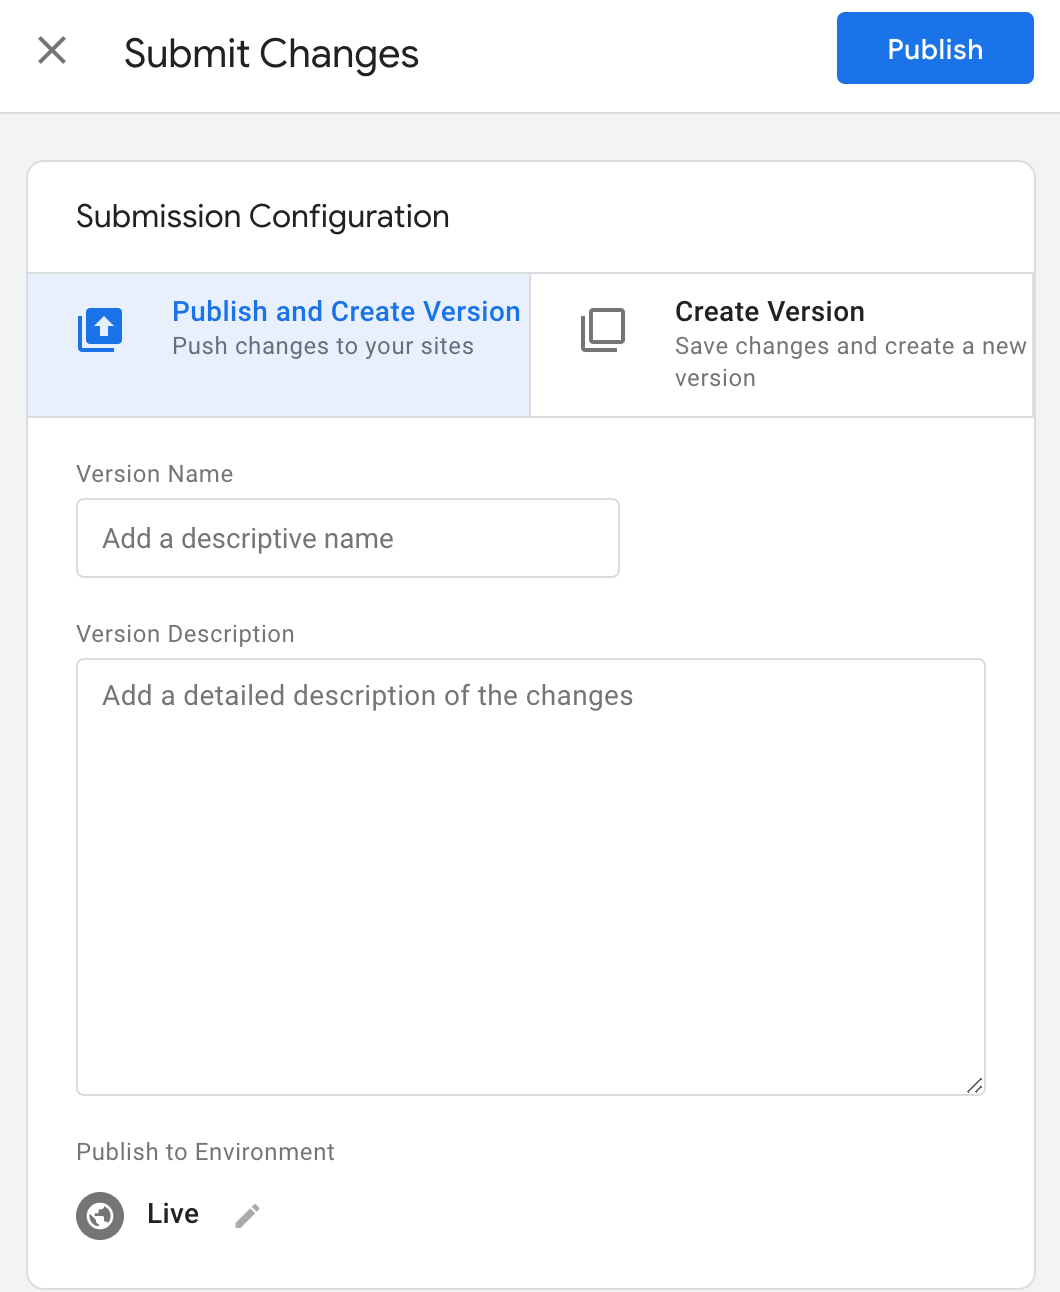
Submit the Container: After configuring your tag, click "Submit" in the top right corner of the GTM interface.

- Describe Your Changes: Add a description of your changes for future reference, then click "Publish".
3.2. Option 2 - On-page Code
3.2.1. Clickio CMP main code and Default Consent Mode config
The Clickio CMP main code and Default Consent Mode config can also be installed directly on the page. You can get codes in "Consent > yoursite.com > Implementation > Install Clickio Consent" section of Clickio Platform.
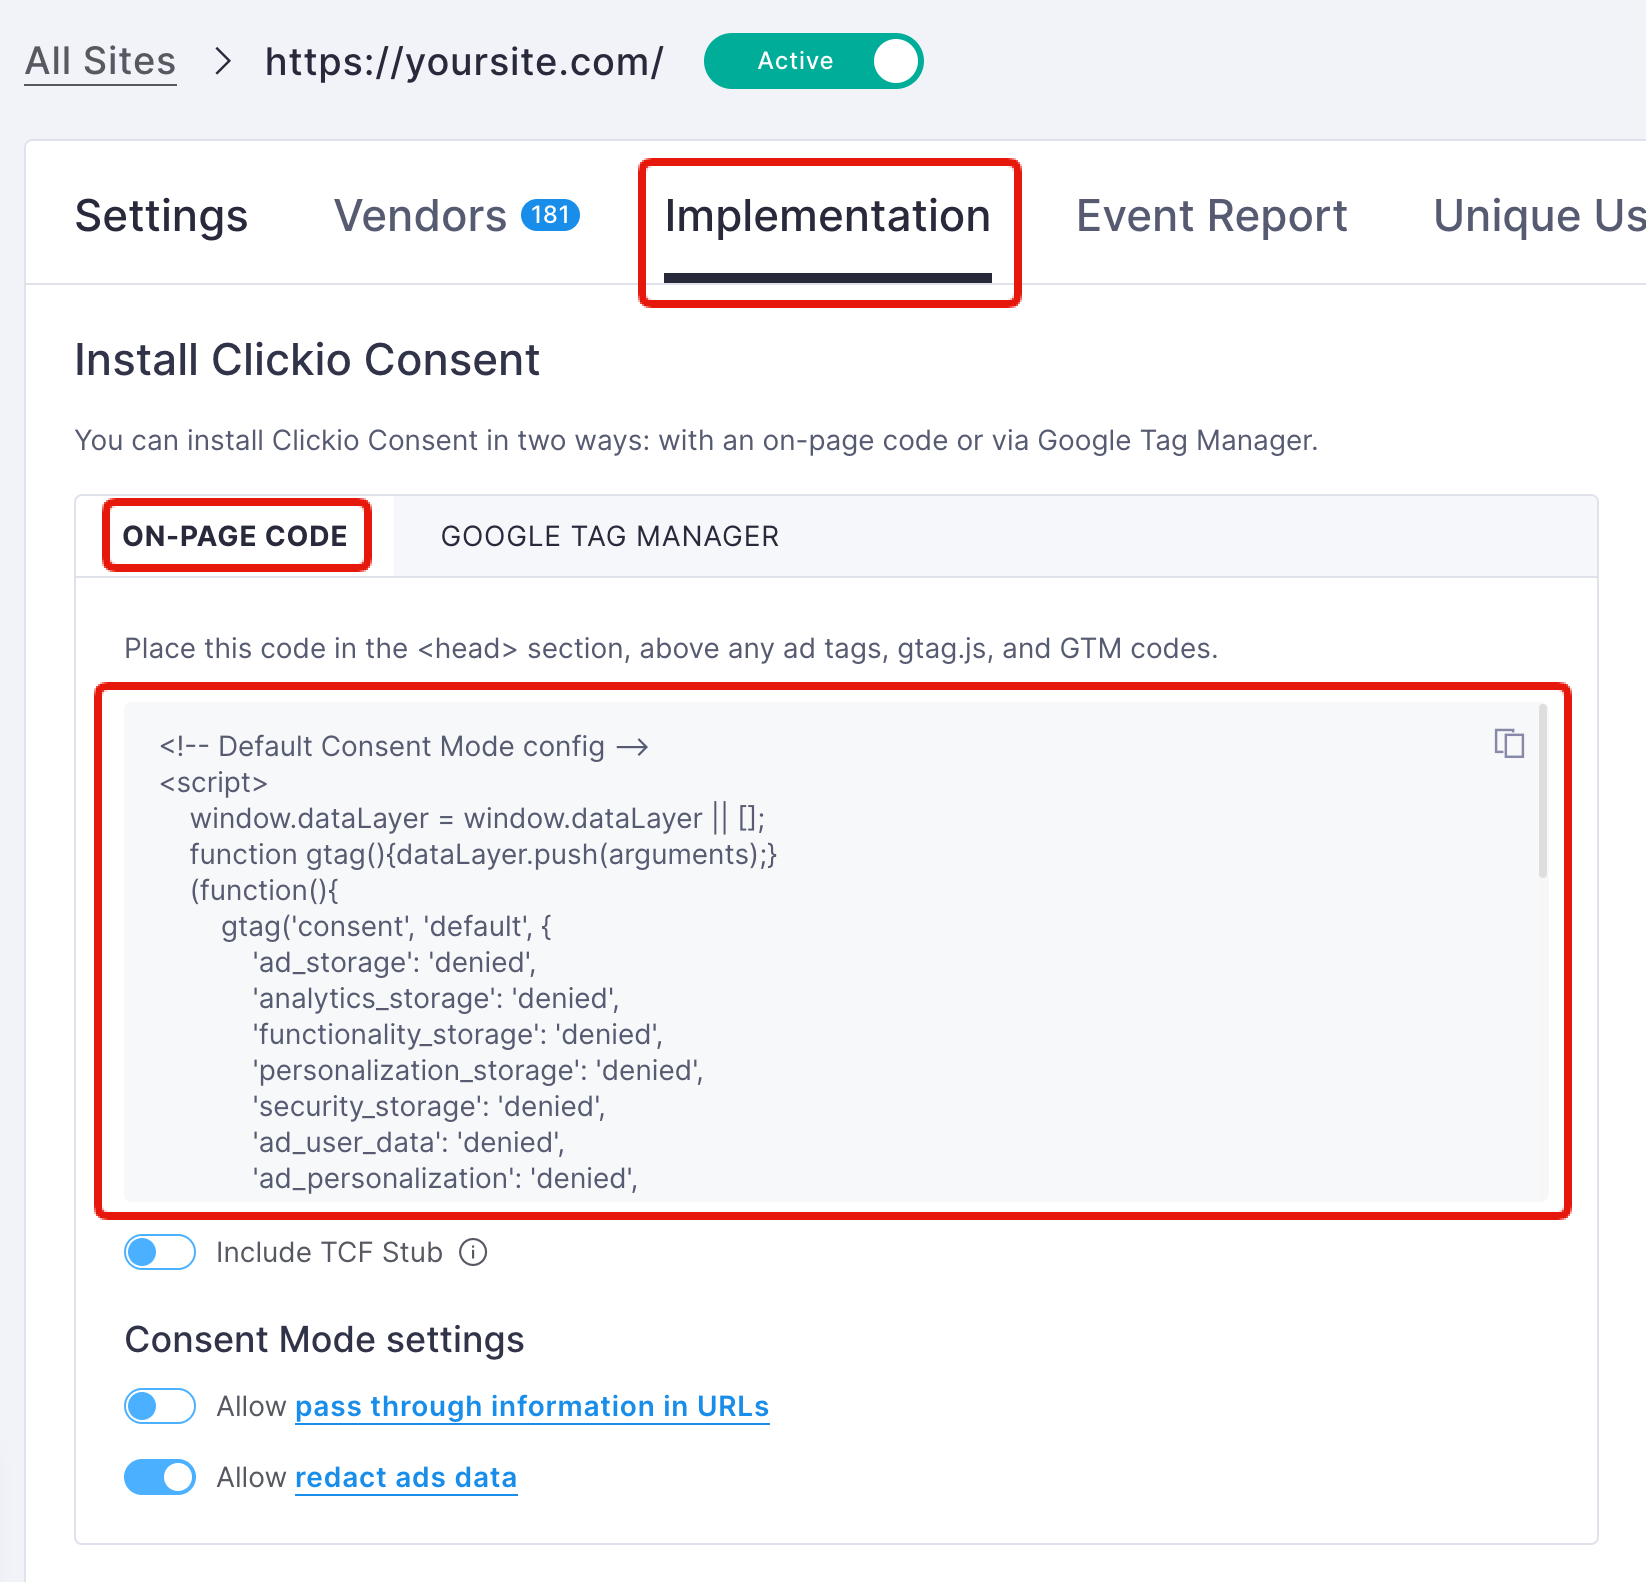
Place this script to the head tag of your website.
3.2.2. Review order of the on-page scripts
Please ensure that all your on-page code snippets placed strictly in this order:
- (optional) TCF API stub
- Consent Mode Default Config
- Clickio CMP main code
- gtag.js and/or GTM code snippet
Important note for Google Tag Gateway (GTG) setups
If your Google tag or GTM container is delivered through Google Tag Gateway (GTG), make sure that the Consent Mode default config is available before any GTG-delivered Google tag evaluates consent or sends measurement commands. Some GTG setups, especially CDN-based or automatically injected implementations, may change the script execution order and cause Google tags to load before Clickio Consent has set the default consent state. This can result in a late consent signal in Google Tag Assistant or the Clickio Consent Mode Diagnostic.
Before publishing the implementation, check whether your Google tag is enrolled in GTG and review the recommended setup options in Google Tag Gateway (GTG) and Clickio Consent Mode.
3.3. Install using a CMS Plugin
Clickio Consent offers plugins to a number of popular Content Management Systems:
- Clickio Consent Wordpress Plugin
- Clickio Consent Drupal Plugin
- Clickio Consent Typo3 Extension
- Clickio Consent Bubble Plugin
In addition to plugins, we also offer detailed instructions on how to install Clickio Consent in a number of other CMS and site/shop providers.
4. Consent Mode: Advanced vs Basic implementation
Basic Consent Mode
In Basic Consent Mode, Google tags only load after the user interacts with the consent banner. This mode ensures that no data is sent to or received by Google without user consent. When the user grants consent, the Clickio CMP main tag execute the consent mode APIs and update consent states. However, if the user does not consent, no data is transferred to Google, and the tags are blocked entirely.
Advanced Consent Mode
In Advanced Consent Mode, Google tags load immediately when the user opens the website or app. The default Consent Mode on-page Config or Clickio Consent GTM Template initially set the default consent states, typically defaulting to "denied" unless specified otherwise. Even when consent is denied, the Google tags send cookieless pings. The Google tags then wait for the user to interact with the Clickio CMP and update the consent states accordingly. If the user grants consent, the Google tags send full measurement data. This mode provides better modeling compared to Basic Consent Mode, offering advertiser-specific models rather than a general model.
Clickio Consent implements Advanced Mode by default. If you prefer to use Basic Mode, you need to block the initial loading of Google tags by following specific instructions.
For more information, please refer to the Google documentation.
5. Consent Mode flags mapping with TCF and non-TCF purposes
In TCF Mode, Clickio CMP aligns Consent Mode flags with the Transparency & Consent Framework, which allows for comprehensive control over user consent and preferences. Additionally, in TCF Mode, Clickio CMP supports adding other vendors with Custom or Standard Non-TCF purposes, which can be managed via the Purposes tab in the consent settings.
In Non-TCF Mode, Clickio CMP offers a set of purposes specifically designed for websites that don't show ads and don't require full TCF compliance. These simplified purposes also align with specific Consent Mode flags.
This table shows which TCF and non-TCF purposes must be accepted in order to send a granted signal for each Consent Mode flag.
| Consent Mode v2 signal (granted) * | TCF Purpose ID (accepted) | Standard non-TCF Purpose (accepted) |
| ad_personalization | 3, 4 | (6) Personalizing and measuring the effectiveness of advertising |
| ad_storage | 1 | (6) Personalizing and measuring the effectiveness of advertising |
| ad_user_data | 1, 7 | (6) Personalizing and measuring the effectiveness of advertising |
| analytics_storage | 1, 8, 9 | (2) Website Analytics |
| functionality_storage | 1 | (3) Additional Functionality |
| personalization_storage | 1, 5, 6 | (4) Content Personalization |
| security_storage | 1 | (5) Security & Fraud Prevention |
* In TCF Mode, if the Clickio CMP configuration includes other vendors with Standard Non-TCF purposes, a 'granted' signal for each Consent Mode flag will only be triggered when both types of purposes (the relevant TCF Purpose IDs and the corresponding Standard Non-TCF purposes) have been accepted by the user.
Allow Consent Mode to read TCF signals
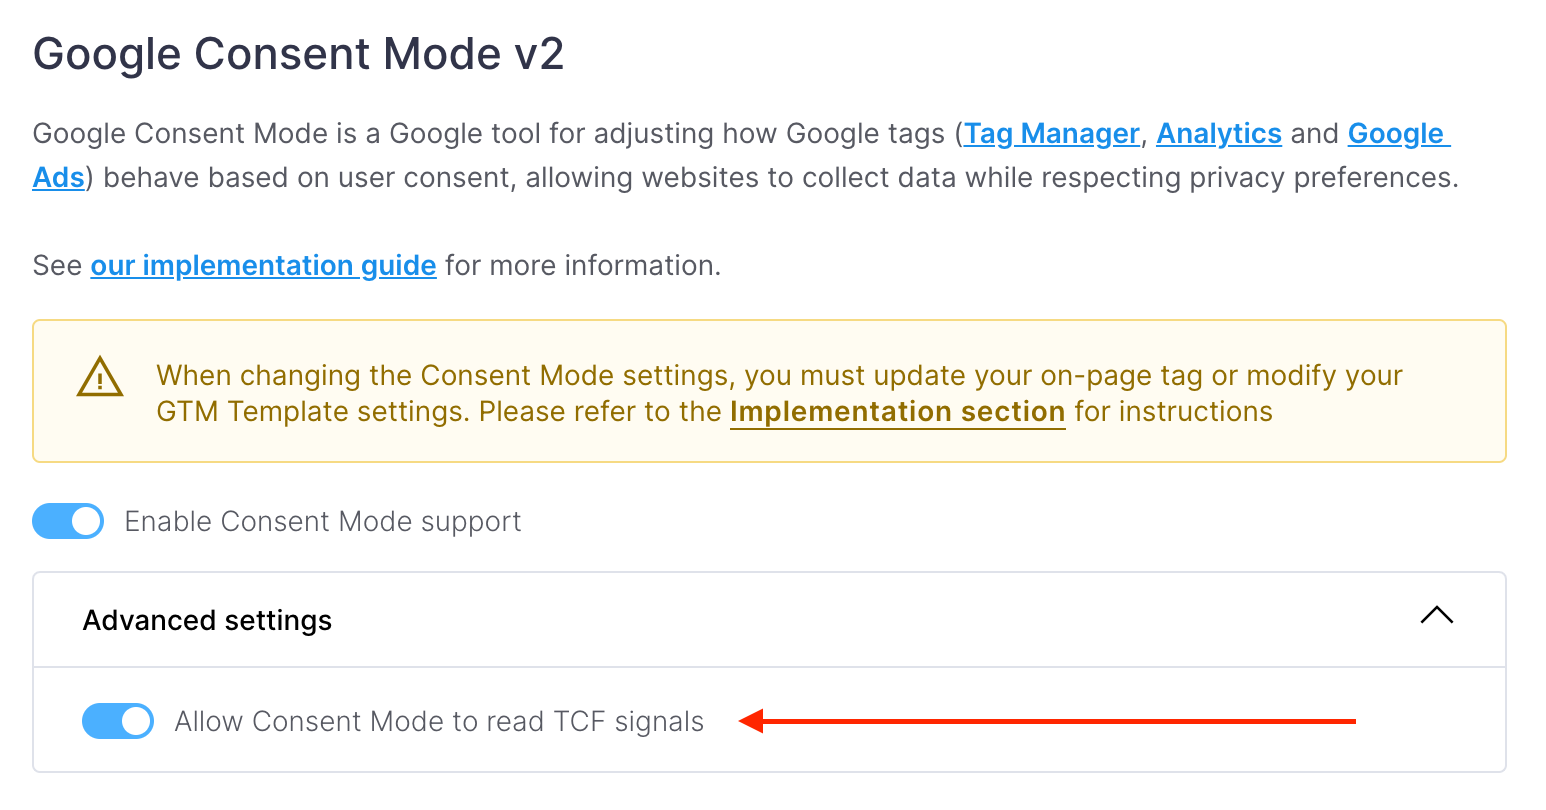
When using Consent Mode with a TCF-mode consent dialog, you have an option to enable the "Allow Consent Mode to read TCF signals" setting. This will set TCData.enableAdvertiserConsentMode flag on the TCData object and the IABTCF_EnableAdvertiserConsentMode flag in the SharedPreferences or NSUserDefaults key value store on mobile device (when using Clickio Consent SDK). When set, Google will infer consent mode ad_storage, ad_user_data, and ad_personalization consents from the TC string (read more). However, we still recommend to install the default config to improve reliability of the implementation and to control the purposes not covered by the TCF integration.
How to Modify Mapping?
If you need to modify mapping or configure more advanced settings, contact Clickio support for assistance. They can help you align your Consent Mode configuration with your specific needs and regulatory requirements.
6. How to verify Consent Mode implementation
For detailed steps on how to verify your implementation, please refer to our guide on How to Check Your Google Consent Mode v2 Implementation. This will ensure that your setup is correctly configured and functioning as expected.
If a late consent signal is detected and the affected Google tag may be delivered through Google Tag Gateway (GTG), also follow the GTG-specific checks and remediation steps in Google Tag Gateway (GTG) and Clickio Consent Mode.
7. Consent Mode Implementation Support
Clickio Consent can proactively detect certain types of incorrect implementations and will show alerts in Clickio Platform.
We offer support and troubleshooting options to Clickio Consent clients. Please reach out to the support team in the platform, email support@clickio.com or contact your account manager (personal account management is available to Enterprise clients and Clickio monetization publishers).
If you encounter Consent Mode implementation issues, you should first contact Clickio support, before contacting Google.
7.1 Submitting a support request in Clickio Platform
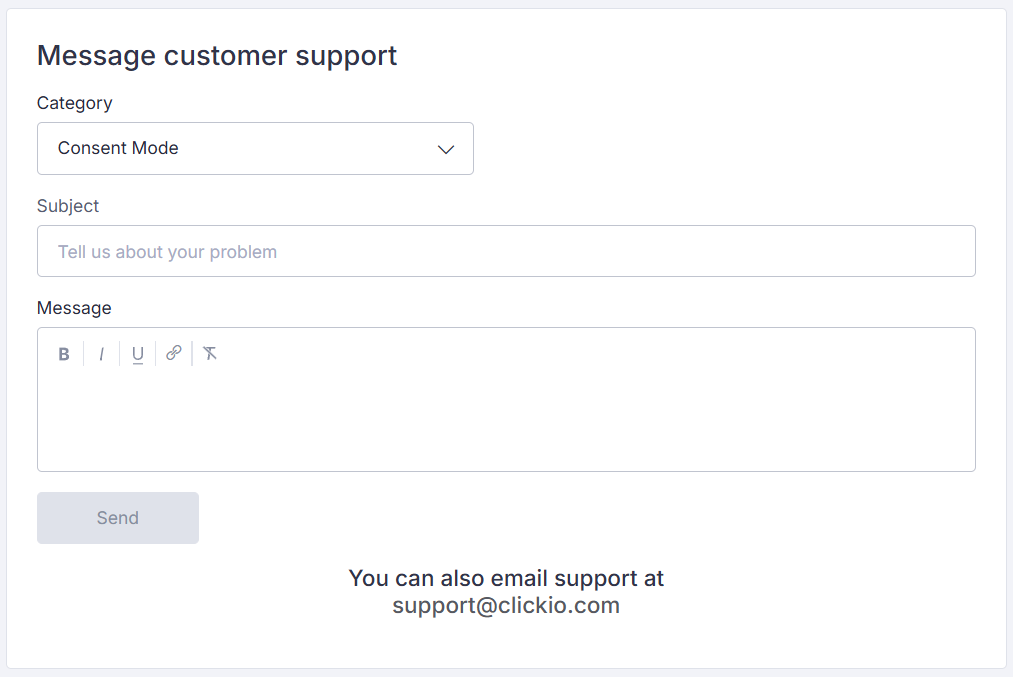
- Login to the Platform
- Navigate to "Help" section
- Choose "Category: Consent Mode"
- Describe your issue and click Send
We will get back to you within the response time period specified for your product plan.