Implementation via Google Tag Manager (GTM)
Warning! Do not use this manual if you have already installed the main code directly.
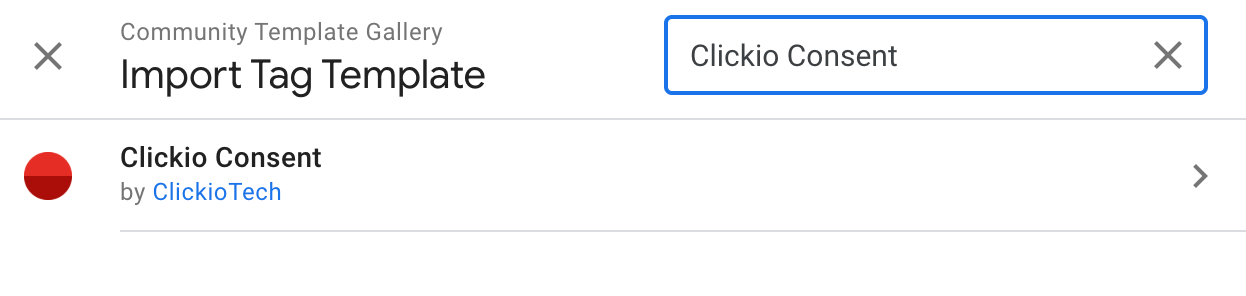
1. How to Install Clickio Consent Template in Google Tag Manager
The Clickio Consent GTM Template enables you to integrate the Clickio CMP and activate Consent Mode directly through Google Tag Manager (GTM) without requiring additional on-page code. Follow these steps to install and configure the template efficiently:
1.1. Access the Google Tag Manager Account
- Log in to GTM: Go to Google Tag Manager and log in to your account.
- Select a Container: Choose the relevant container for the website where you want to manage consent.
1.2. Install the Clickio Consent Template
1.3. Create a Tag Using the Template
-
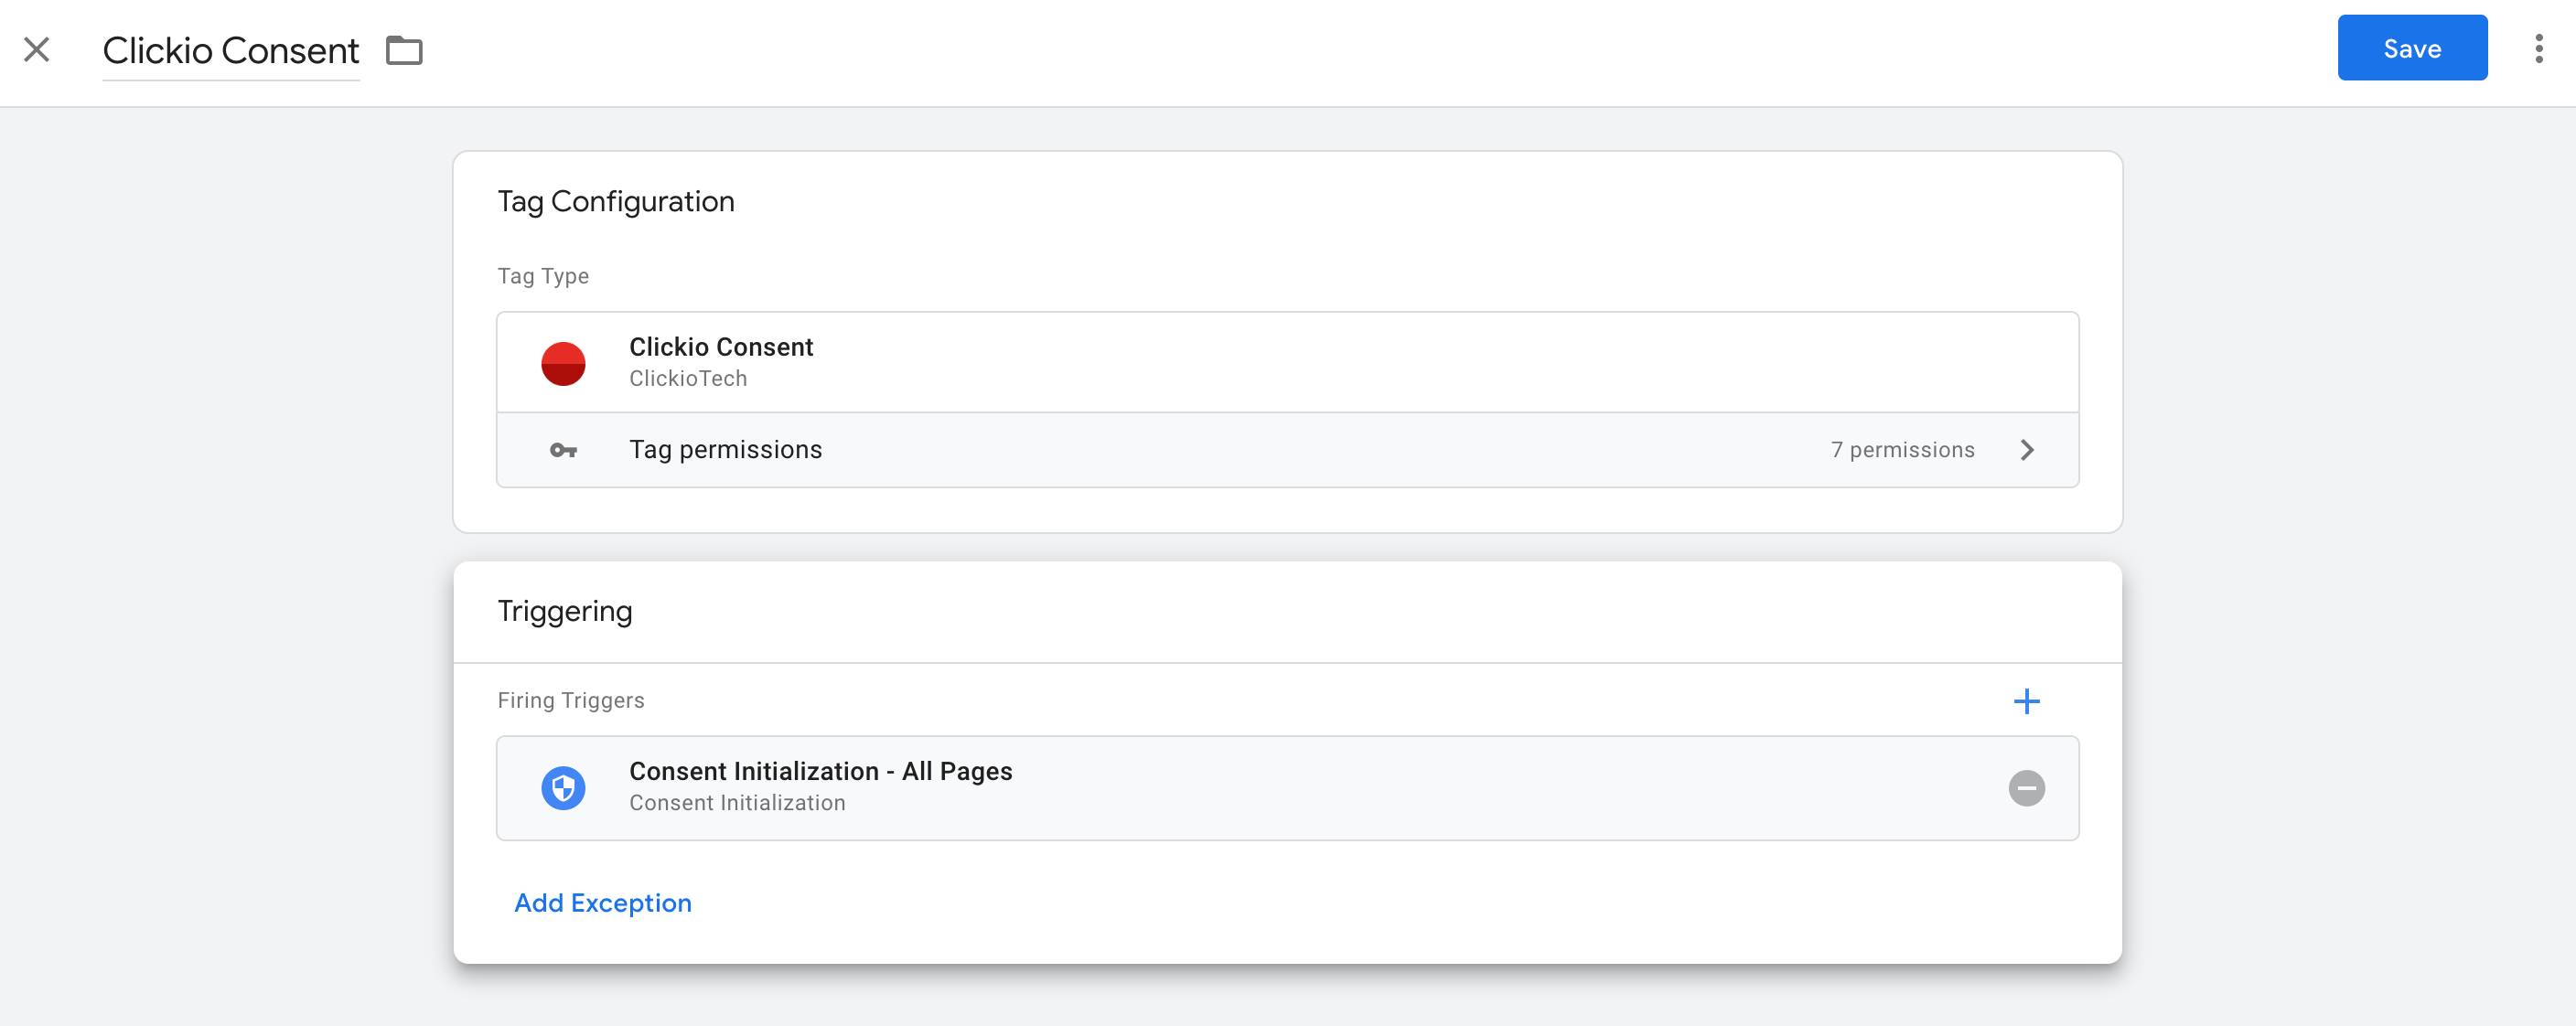
Create a New Tag:
- Go to the “Tags” section in your container and click on “New” to create a new tag.
-
Select the Clickio Consent Template:
- Click on “Tag Configuration” and select “Clickio Consent” from the list of available tag templates.
- Change tag name from "Untitled Tag" to “Clickio Consent”
-
Set Up the Trigger:
-
- In the same tag configuration window, click on “Triggering” and choose an existing internal trigger "Consent Initialization - All Pages" or create a new trigger based on the "Consent initialization" event type.
- Please do not use triggers based on the "Page View" or "Initialization" event types. Read more about Page View triggers.
-
-
Save the Tag:
-
- Save the tag after selecting the appropriate trigger.
-
2. Enable Clickio CMP Main Code
2.1. Configure the Clickio Consent Template
-
Access the Template: Go to the "Tags" section within your GTM container, then click the previously created "Clickio Consent" tag.
-
Enable Clickio CMP:
- Check the box labeled "Enable Clickio CMP" to automatically include the Clickio CMP code on your page.
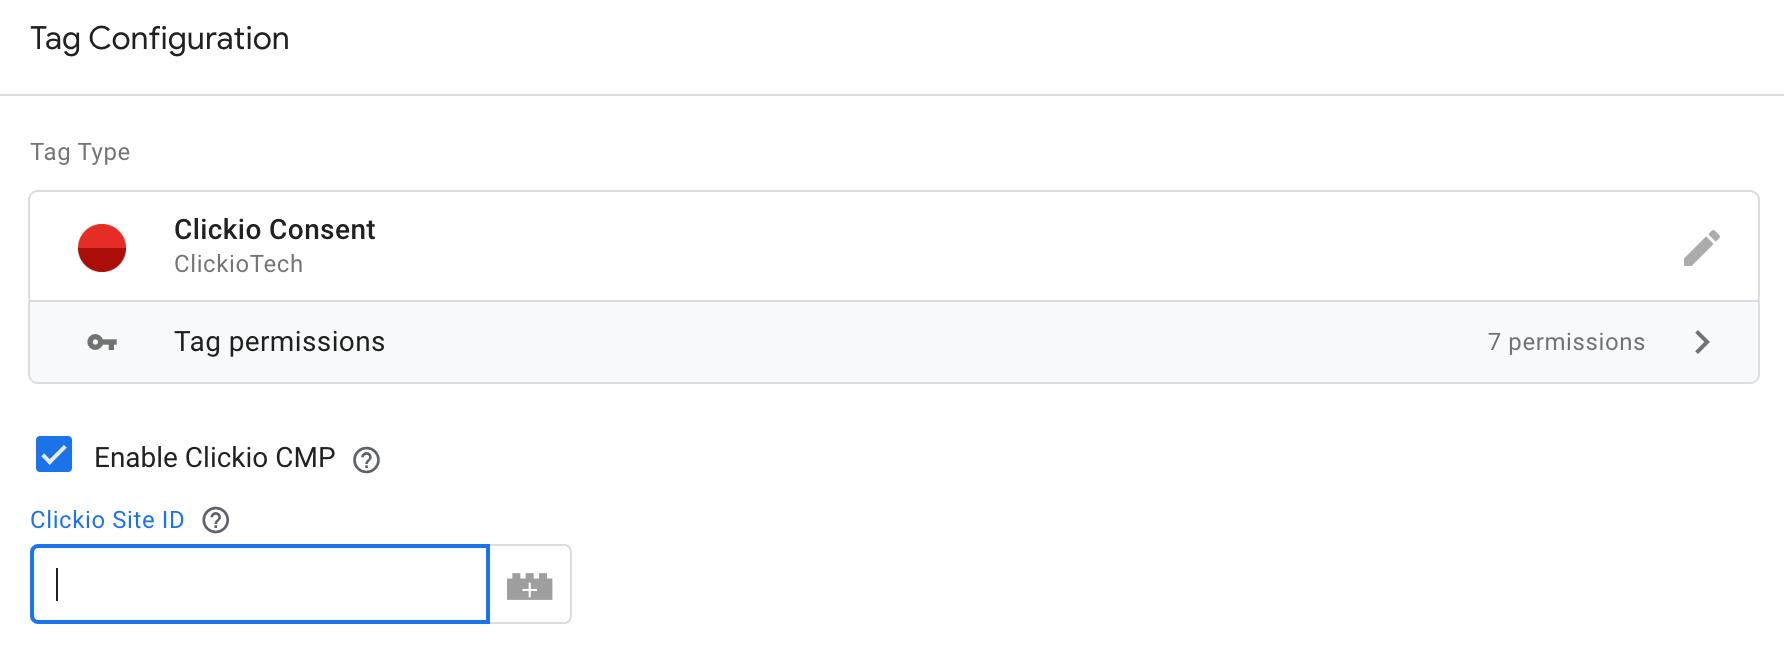
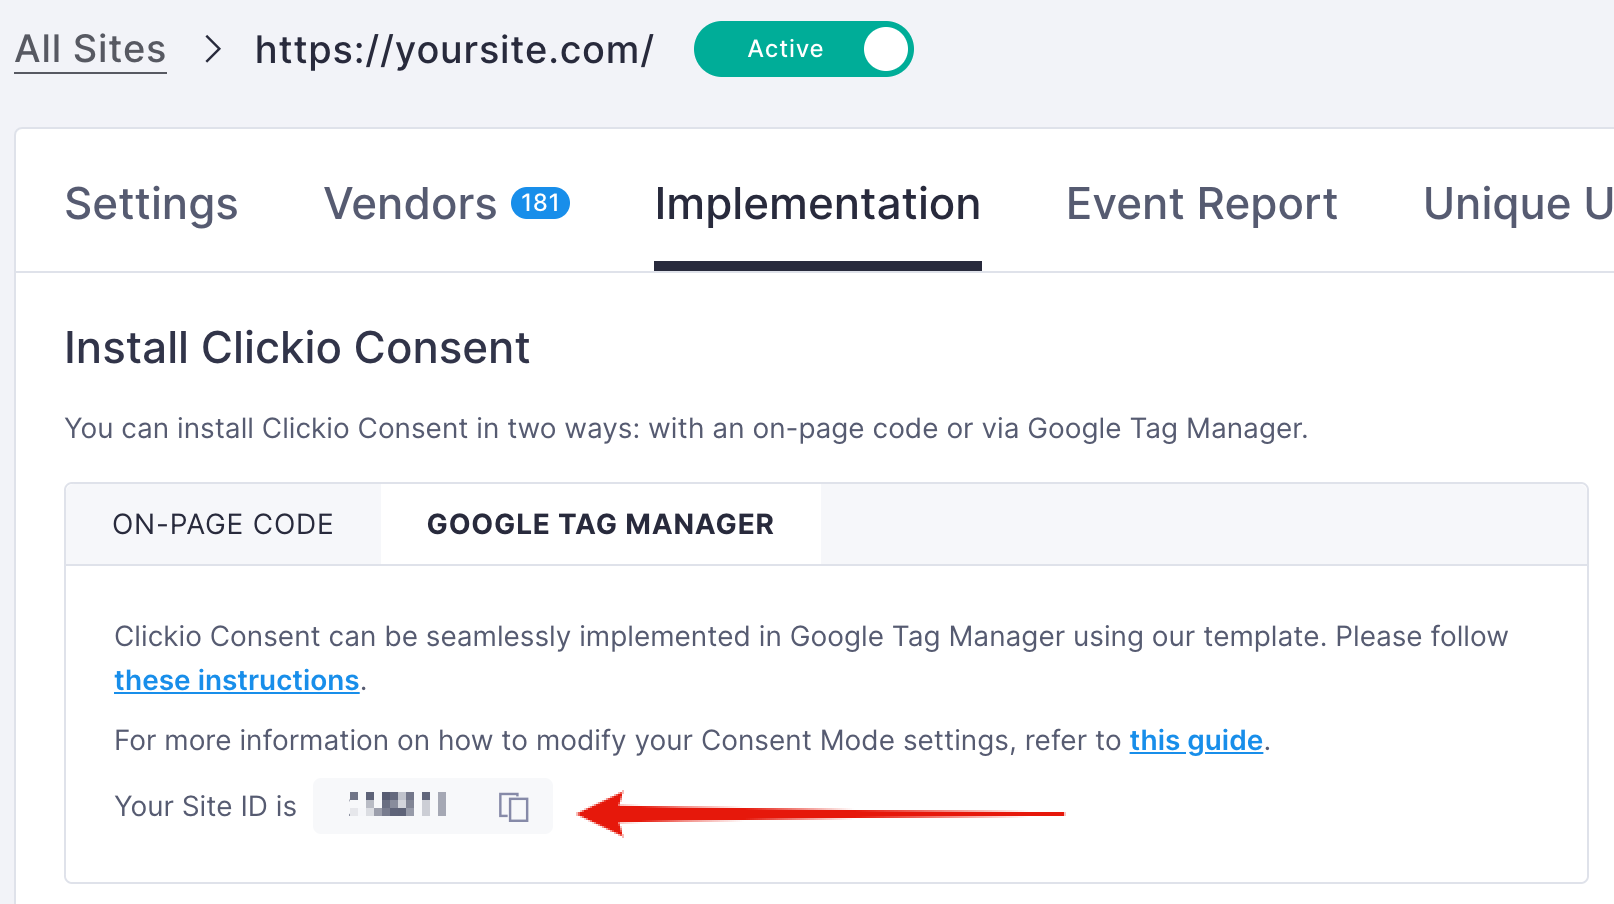
- Enter your Clickio Site ID. You can find the Site ID in the Clickio platform under "Consent > yoursite.com > Implementation > Google Tag Manager".

- Check the box labeled "Enable Clickio CMP" to automatically include the Clickio CMP code on your page.
-
Save the Tag: Once configured, save your tag by clicking "Save".

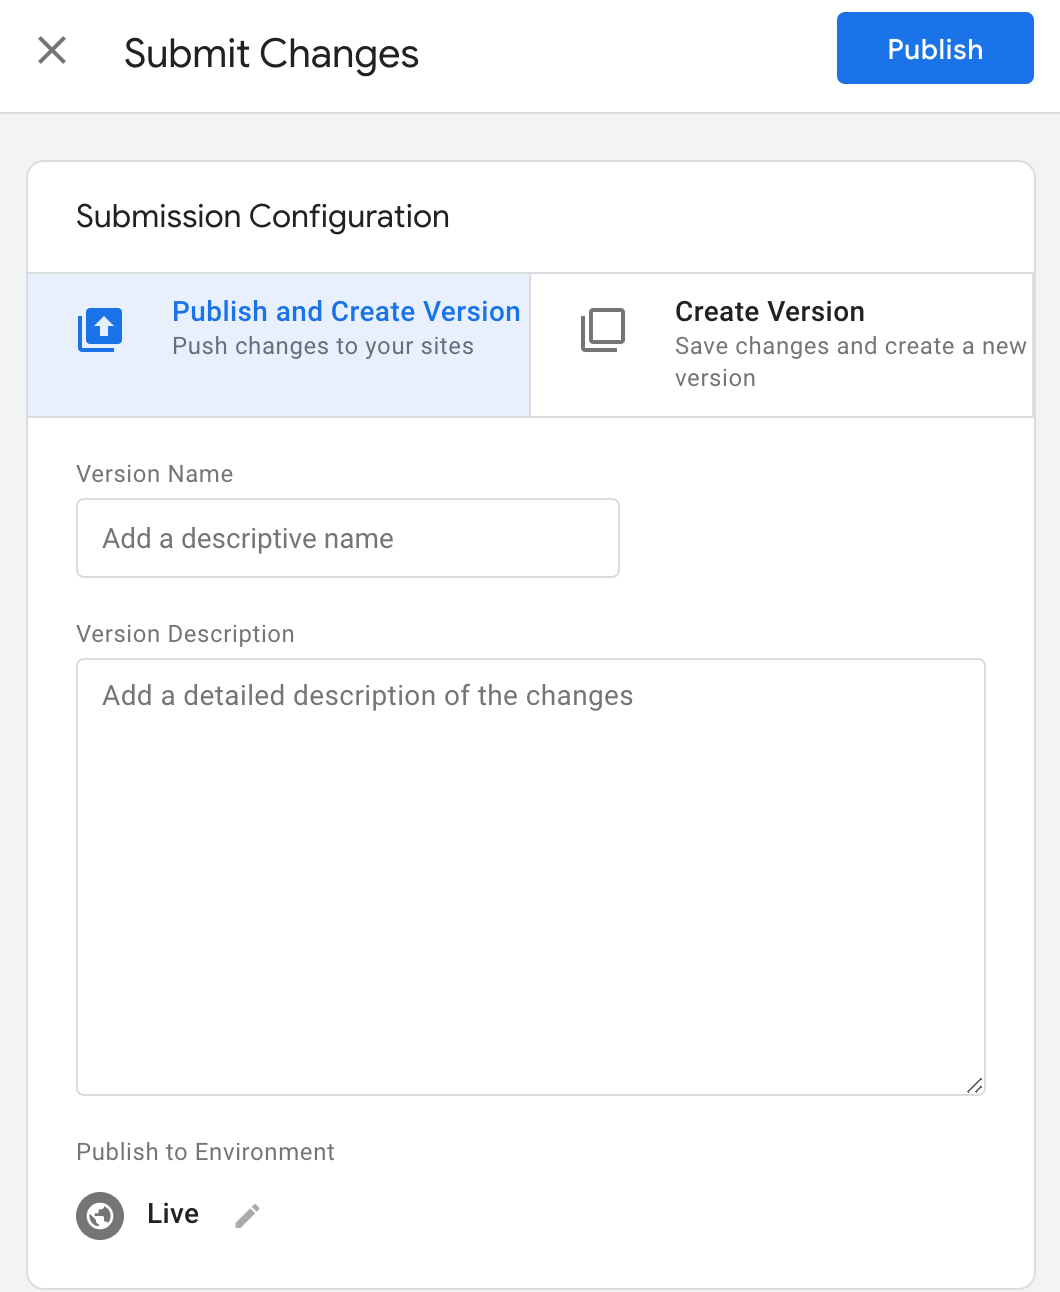
2.2. Publish Changes
-
Submit the Container: After configuring your tag, click "Submit" in the top right corner of the GTM interface.

- Describe Your Changes: Add a description of your changes for future reference, then click "Publish".
3. To enable Consent Mode, follow these instructions
4. To block non-Google and non-TCF tags based on consent choices, follow these instructions