How to Create an Ad Unit?
Before you start, make sure the Clickio Header code is already installed on your website. Without this step, ad units might not function properly.
2. Add a New Ad Unit: Click the “+ Add Ad Unit” button.
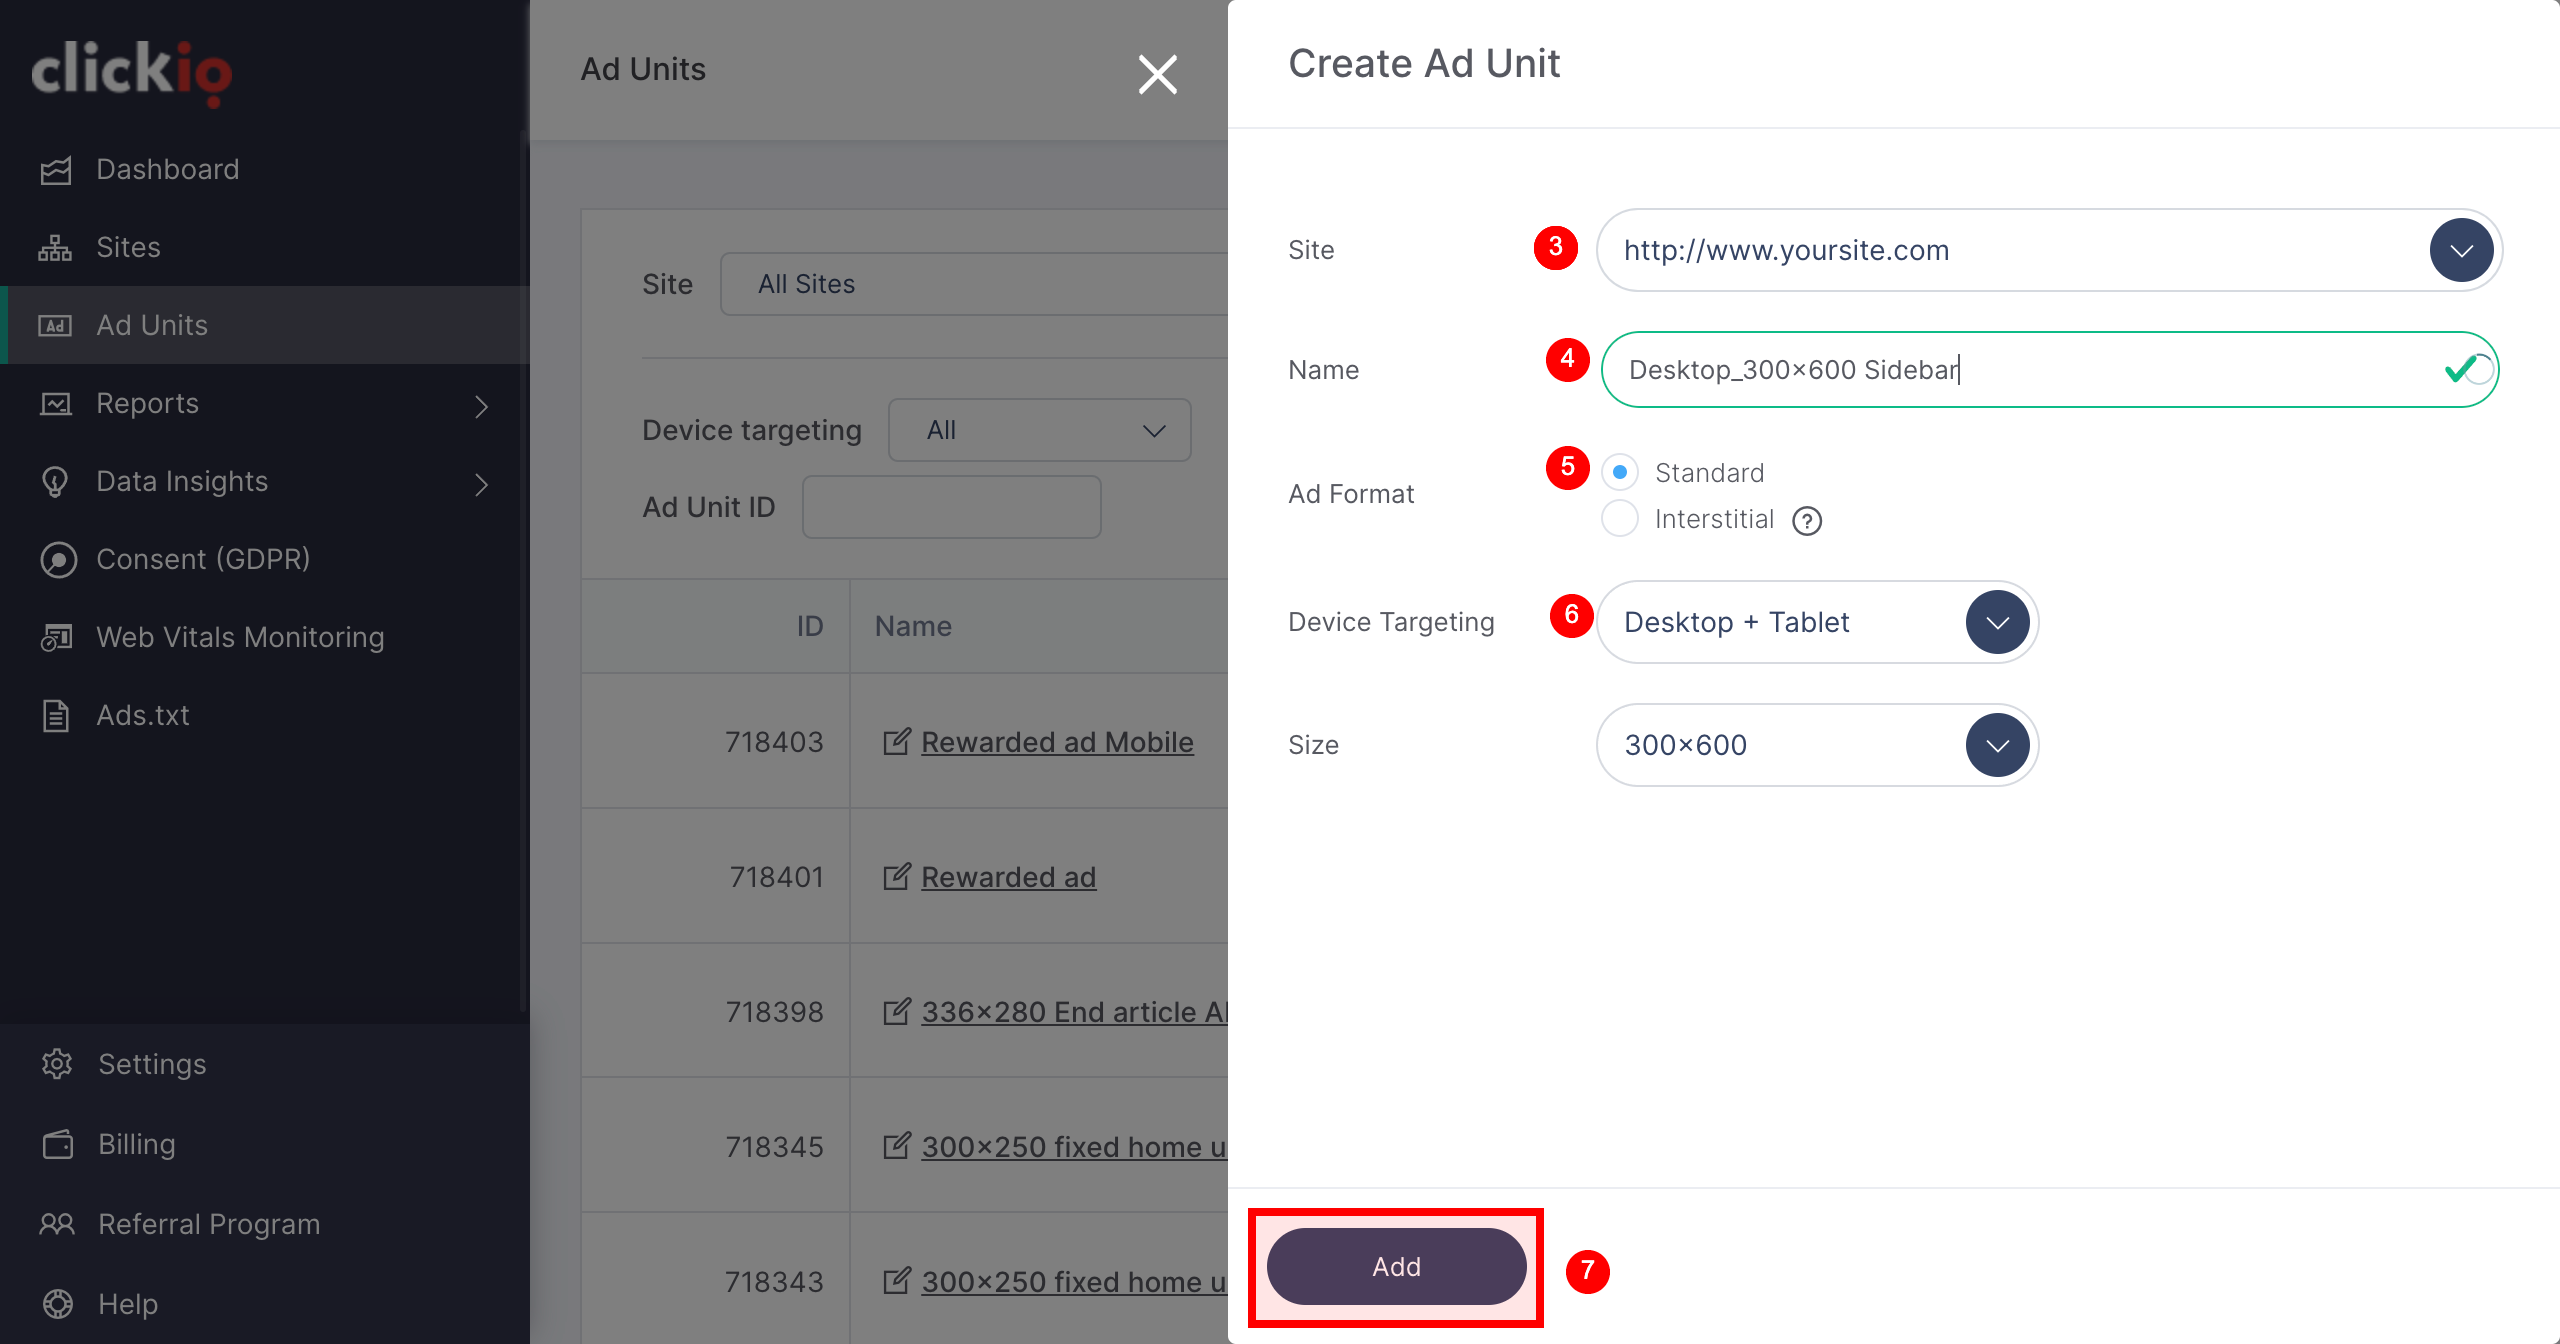
3. Select a Site: From the dropdown list, choose the site where you want to create the new ad unit.
4. Name the Ad Unit: Give your ad unit a clear, descriptive name. Best practice: include details like position (sidebar, top, bottom), size (300x250, 728x90, etc.), and device (desktop or mobile) so you can easily recognize it later.
5. Choose an Ad Format:
- For Standard Ad Unit choose the ad unit size.
- For Interstitial Ad Unit enable “Place ad unit automatically.”
Clickio also supports a wide range of special ad formats designed to maximize monetization and user experience:
Further details on available ad formats, including comprehensive descriptions and demo pages, can be found here.
These advanced formats may require additional customization. To activate them, contact your Account Manager or email support@clickio.com with your site details and the desired ad units.
6. Set Device Targeting: Select whether the ad unit will appear on:
-
Desktop + Tablet, or
- Mobile
For best results, create separate ad units for desktop/tablet and for mobile. This ensures better optimization and reporting.
7. Save the Ad Unit: Click “Add” to create the unit.
8. Open the Implementation Tab: After creating an ad unit, the next step is to implement the code correctly on your website or app. The Implementation tab inside the Ad Unit settings provides three options for integration:
-
On-Page Code
-
Google Ad Manager (GAM)
-
Google Tag Manager (GTM)
Correct implementation is essential to ensure that ads display properly, reporting is accurate, and revenue potential is maximized. Always follow the Clickio Tags Implementation Guide for best results.
IMPORTANT: If you are setting up an Interstitial ad unit, make sure to disable Vignette ads (Auto ads format) in AdSense first. Running both at the same time may cause conflicts. You can find detailed instructions here.