How to Implement Clickio Tags in Google Ad Manager?
To implement Clickio tags in Google Ad Manager, follow these step-by-step instructions:
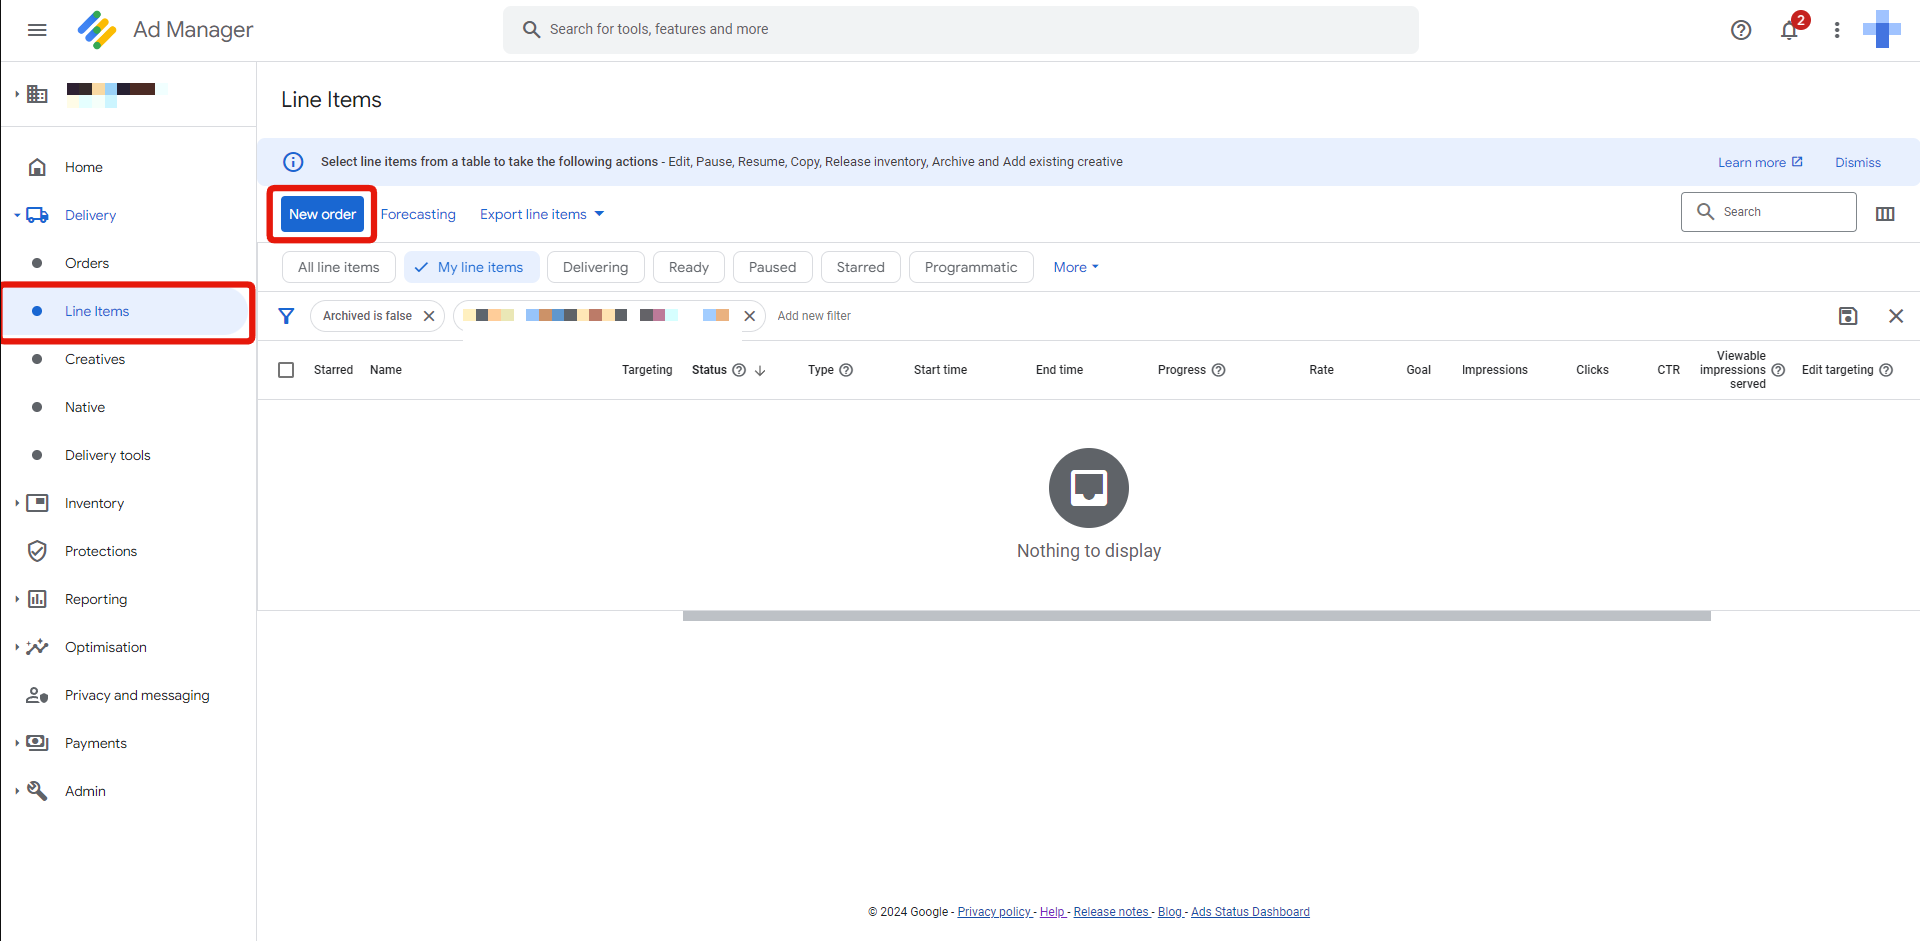
Step 1: Create a New Order and Line Item
1. Create New Order: Navigate to Delivery > Line items > New order.
2. General Settings:
- Provide necessary data in the General settings.
- Click "Add Line Item" to proceed.
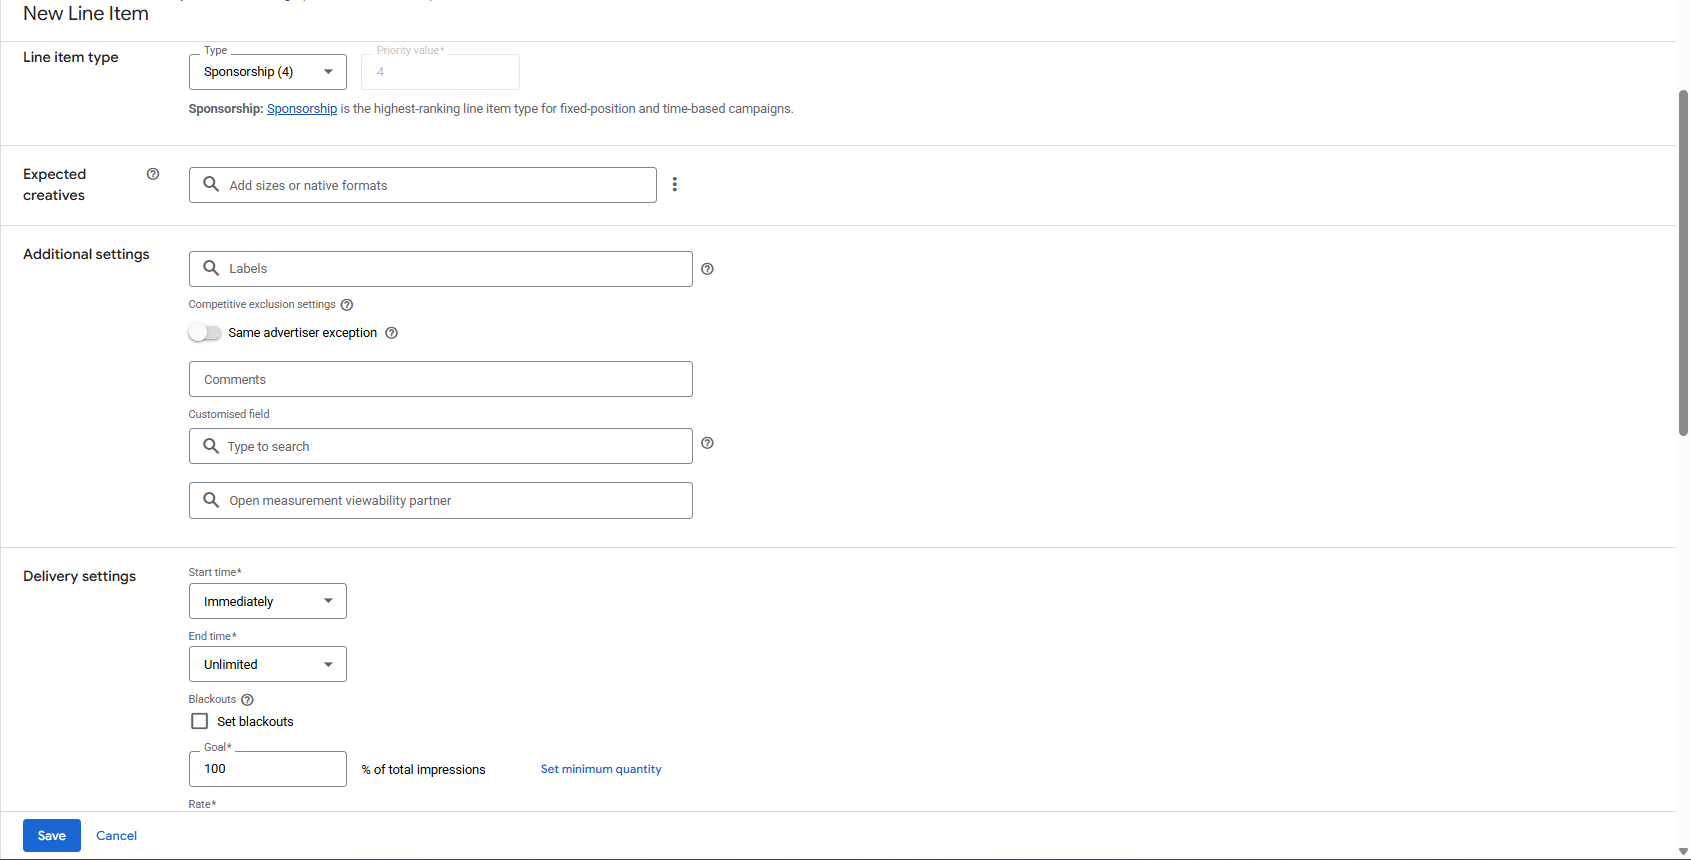
3. Default Delivery Settings. Ensure the following fields are correctly filled:
- Line item type: Sponsorship (4)
- Start time: Immediately
- End time: Unlimited
- Goal: 100%
Alternatively, if you serve direct campaigns on this inventory, you can use the following settings:
- Line item type: Network (12)
- Start time: Immediately
- End time: Unlimited
- Goal: 100%
- Line item CPM: 100 USD or equivalent in your network currency
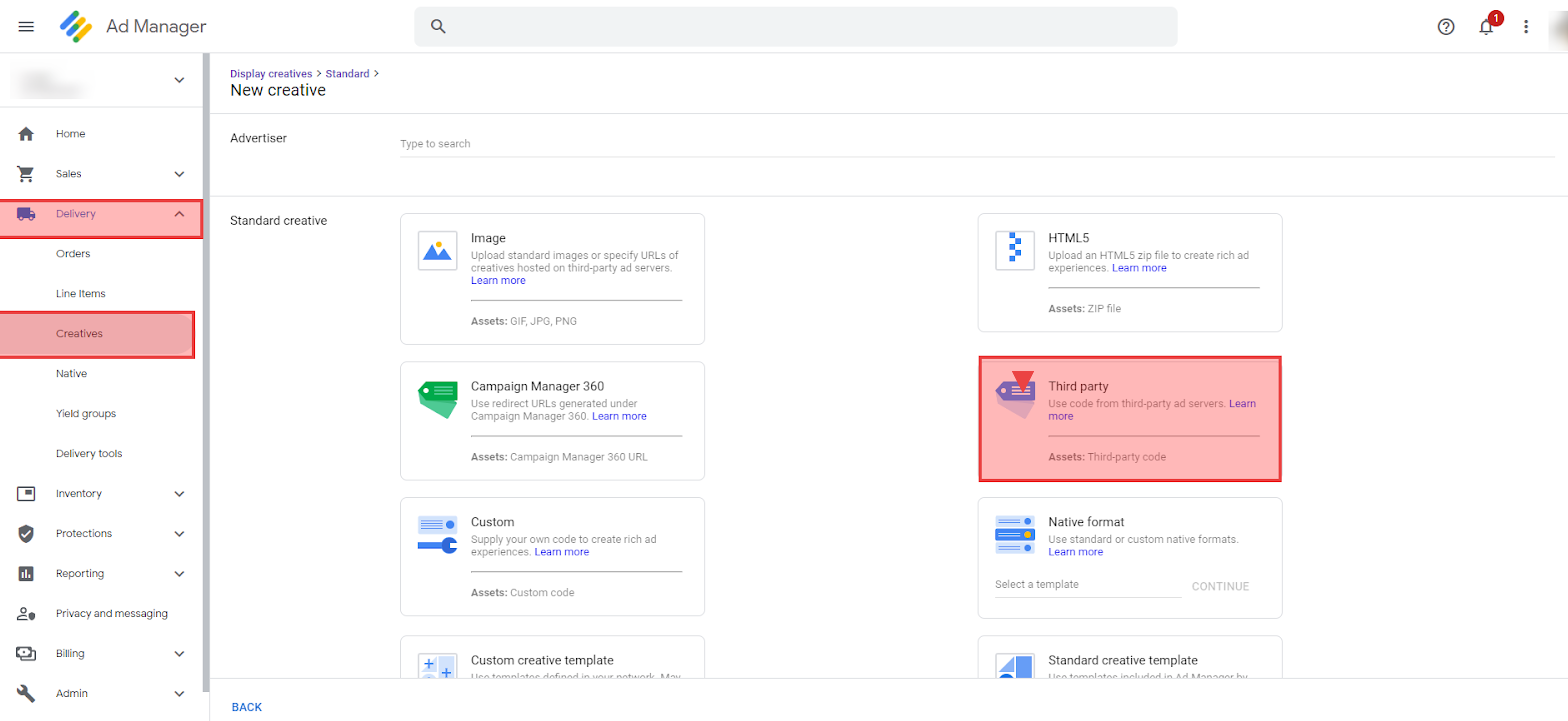
Step 2: Add Creatives to the Line Item
1. Add Third-Party Creatives: Create a new Third-Party creative for each Clickio ad placement.
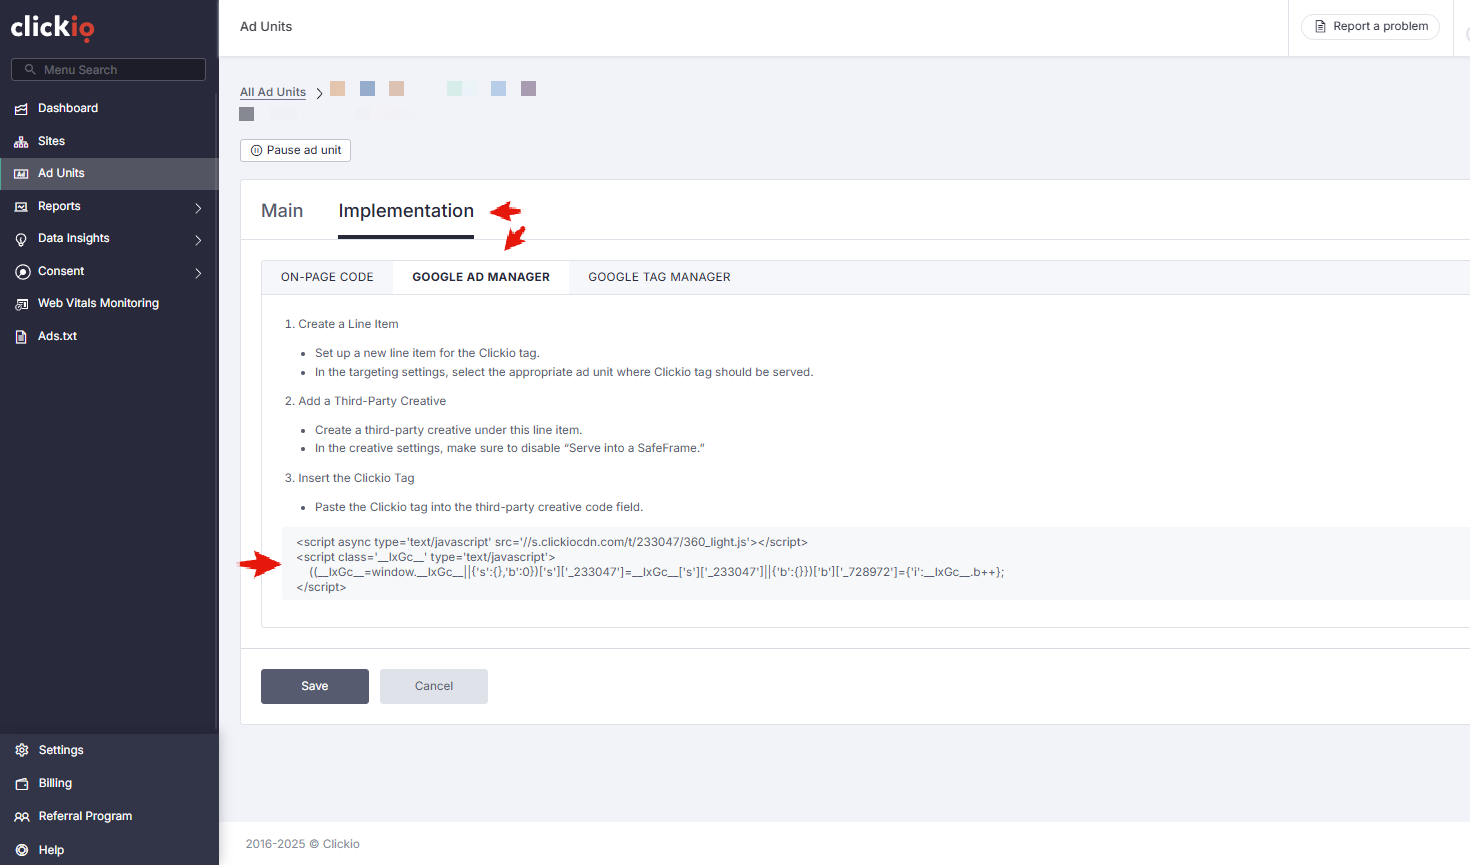
3. Paste Ad Unit Tags: Paste the ad unit tag into the Code snippet field in Google Ad Manager.
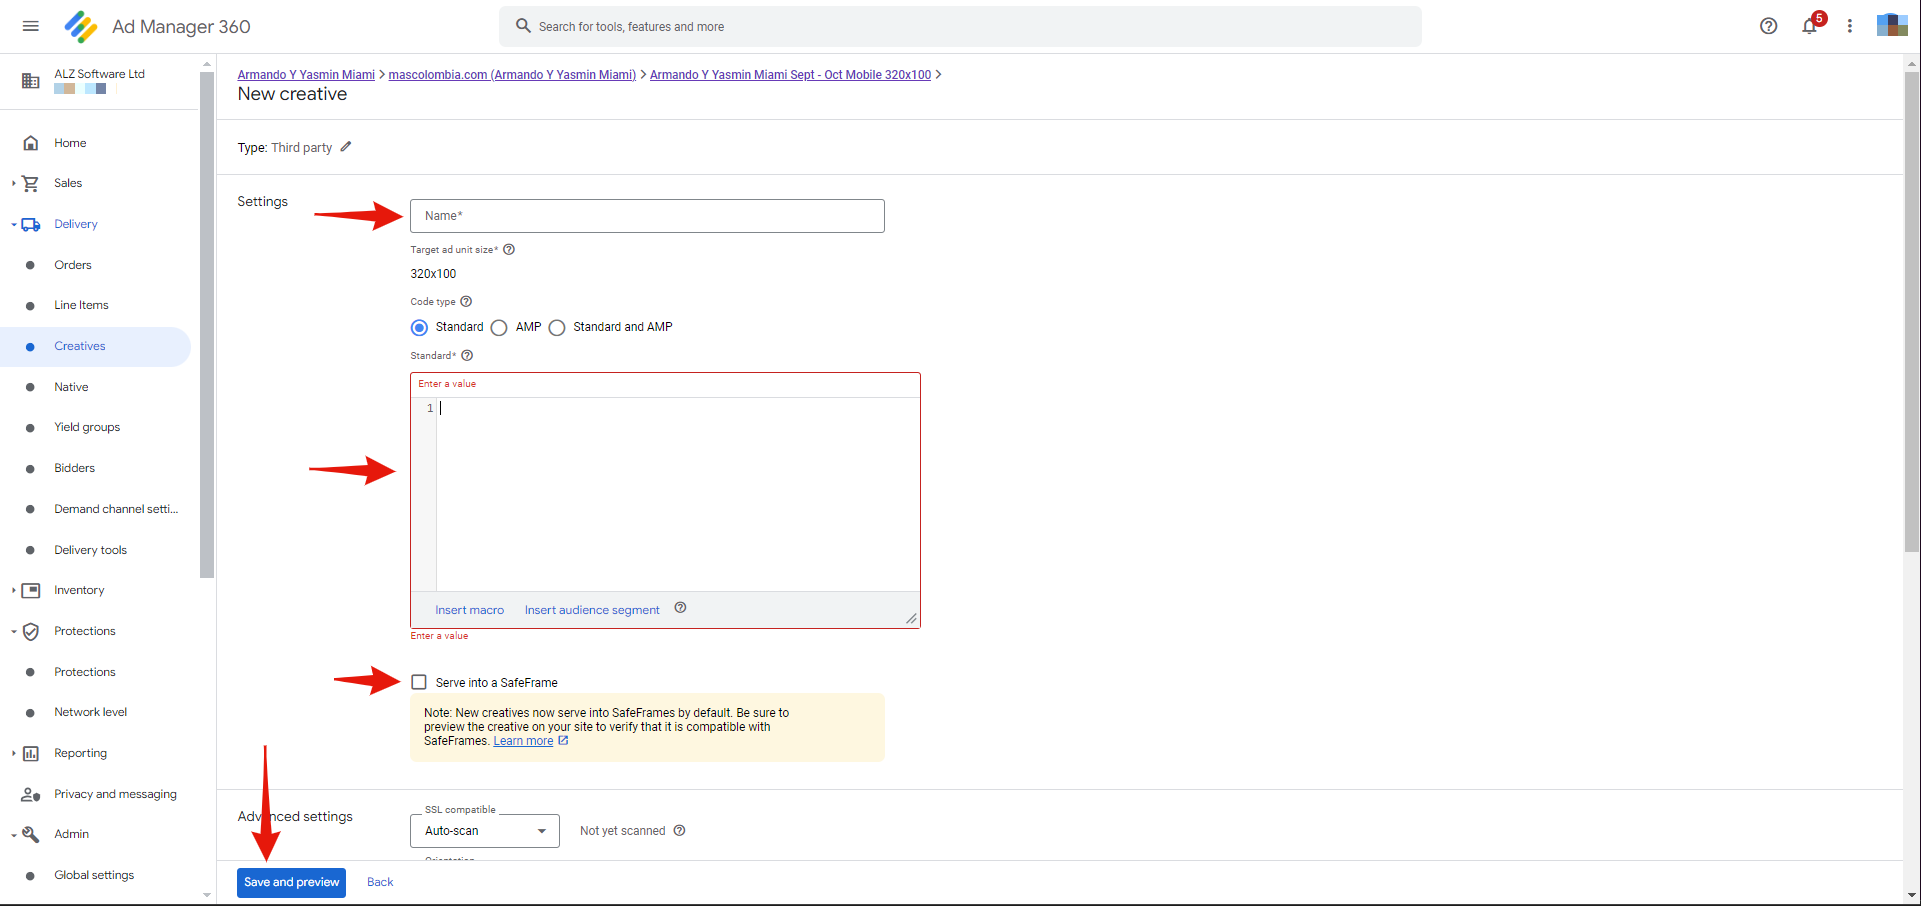
4. Disable Serve into a SafeFrame: Ensure the Serve into a SafeFrame option is disabled to prevent reporting discrepancies.
The notification “Sorry, we don't recognize this tag” appears as Google Ad Manager doesn’t recognize Clickio JavaScript code. The notification is not critical and can be ignored.
Step 3: Add Clickio as Ad Partner Technology
2. Check Creatives for Consent: Click "Add URLs" in the Check creatives for consent section.

3. Add Clickio URL: Add "clickiocdn.com" as a URL in the Ad partner URL field.

4. Click "Done" and then "Save".

Congratulations! Clickio tags have been successfully implemented in Google Ad Manager. Ad serving will start within 15-30 minutes.
Assistance with Implementation
- Contact Clickio Support: If you need further assistance or information, contact your Clickio account manager or email Clickio Support at support@clickio.com.
- Grant Clickio Access: For efficient troubleshooting, grant Clickio access to your Google Ad Manager account following the provided instructions.
-
Notify Account Manager: After granting access, notify your Clickio account manager.
-
Deactivate Clickio User: Once implementation is successful, deactivate the Clickio user by changing the status from Active to Inactive.