How to Create an Ad Manager Network Account
If you have a Google AdSense account, ensure that you've enabled Admin access for the user email address with which you wish to create an Ad Manager Network account. This step is crucial for smooth account creation and management.
Before proceeding, ensure you don't already have an associated Ad Manager account. If you do, sign in and accept any pending invitations. Creating duplicate accounts can lead to disapproval by Google.
To create an Ad Manager Network account, please follow the instructions below.
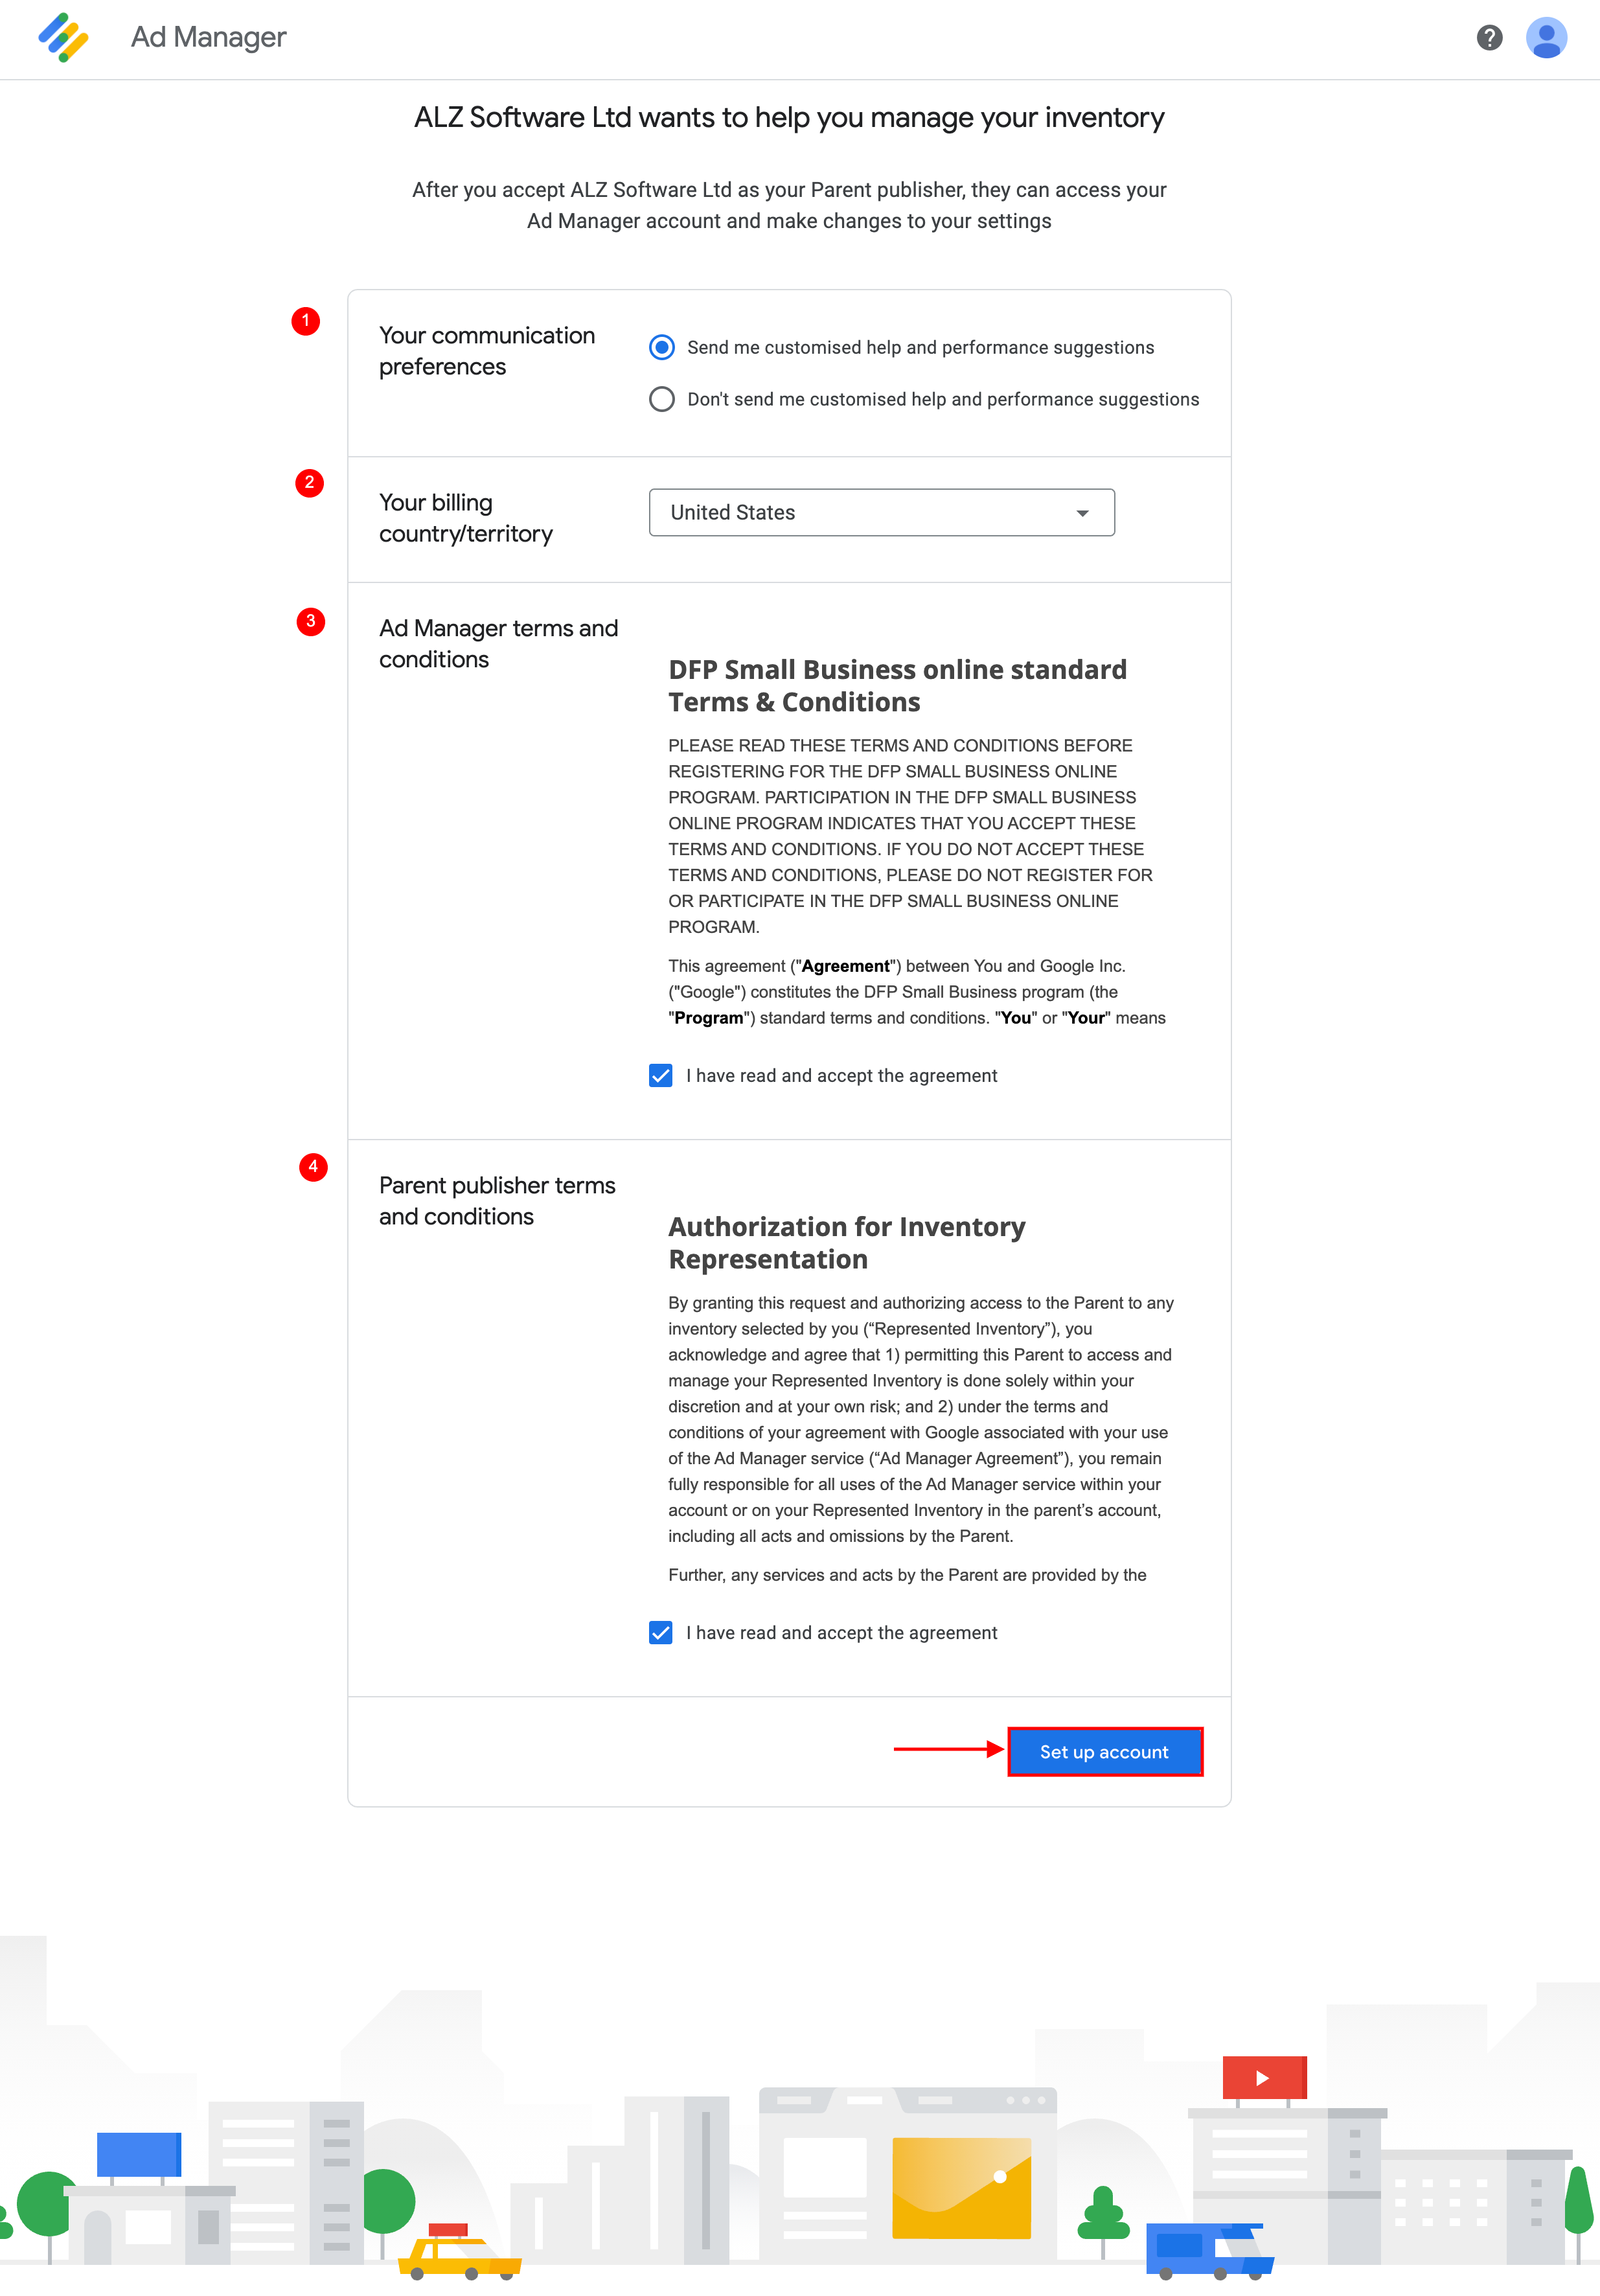
1. Set Communication Preferences: Begin by setting your preferred communication preferences. This ensures you receive important updates and notifications regarding your account.
2. Select Billing Country: Choose your billing country from the available options.
3. Read and Accept Terms: Carefully review and accept the terms and conditions for Ad Manager.
4. Read and Accept Parent Publisher Terms: Similarly, read and agree to the terms and conditions for Parent publishers.
5. Click "Set up account".
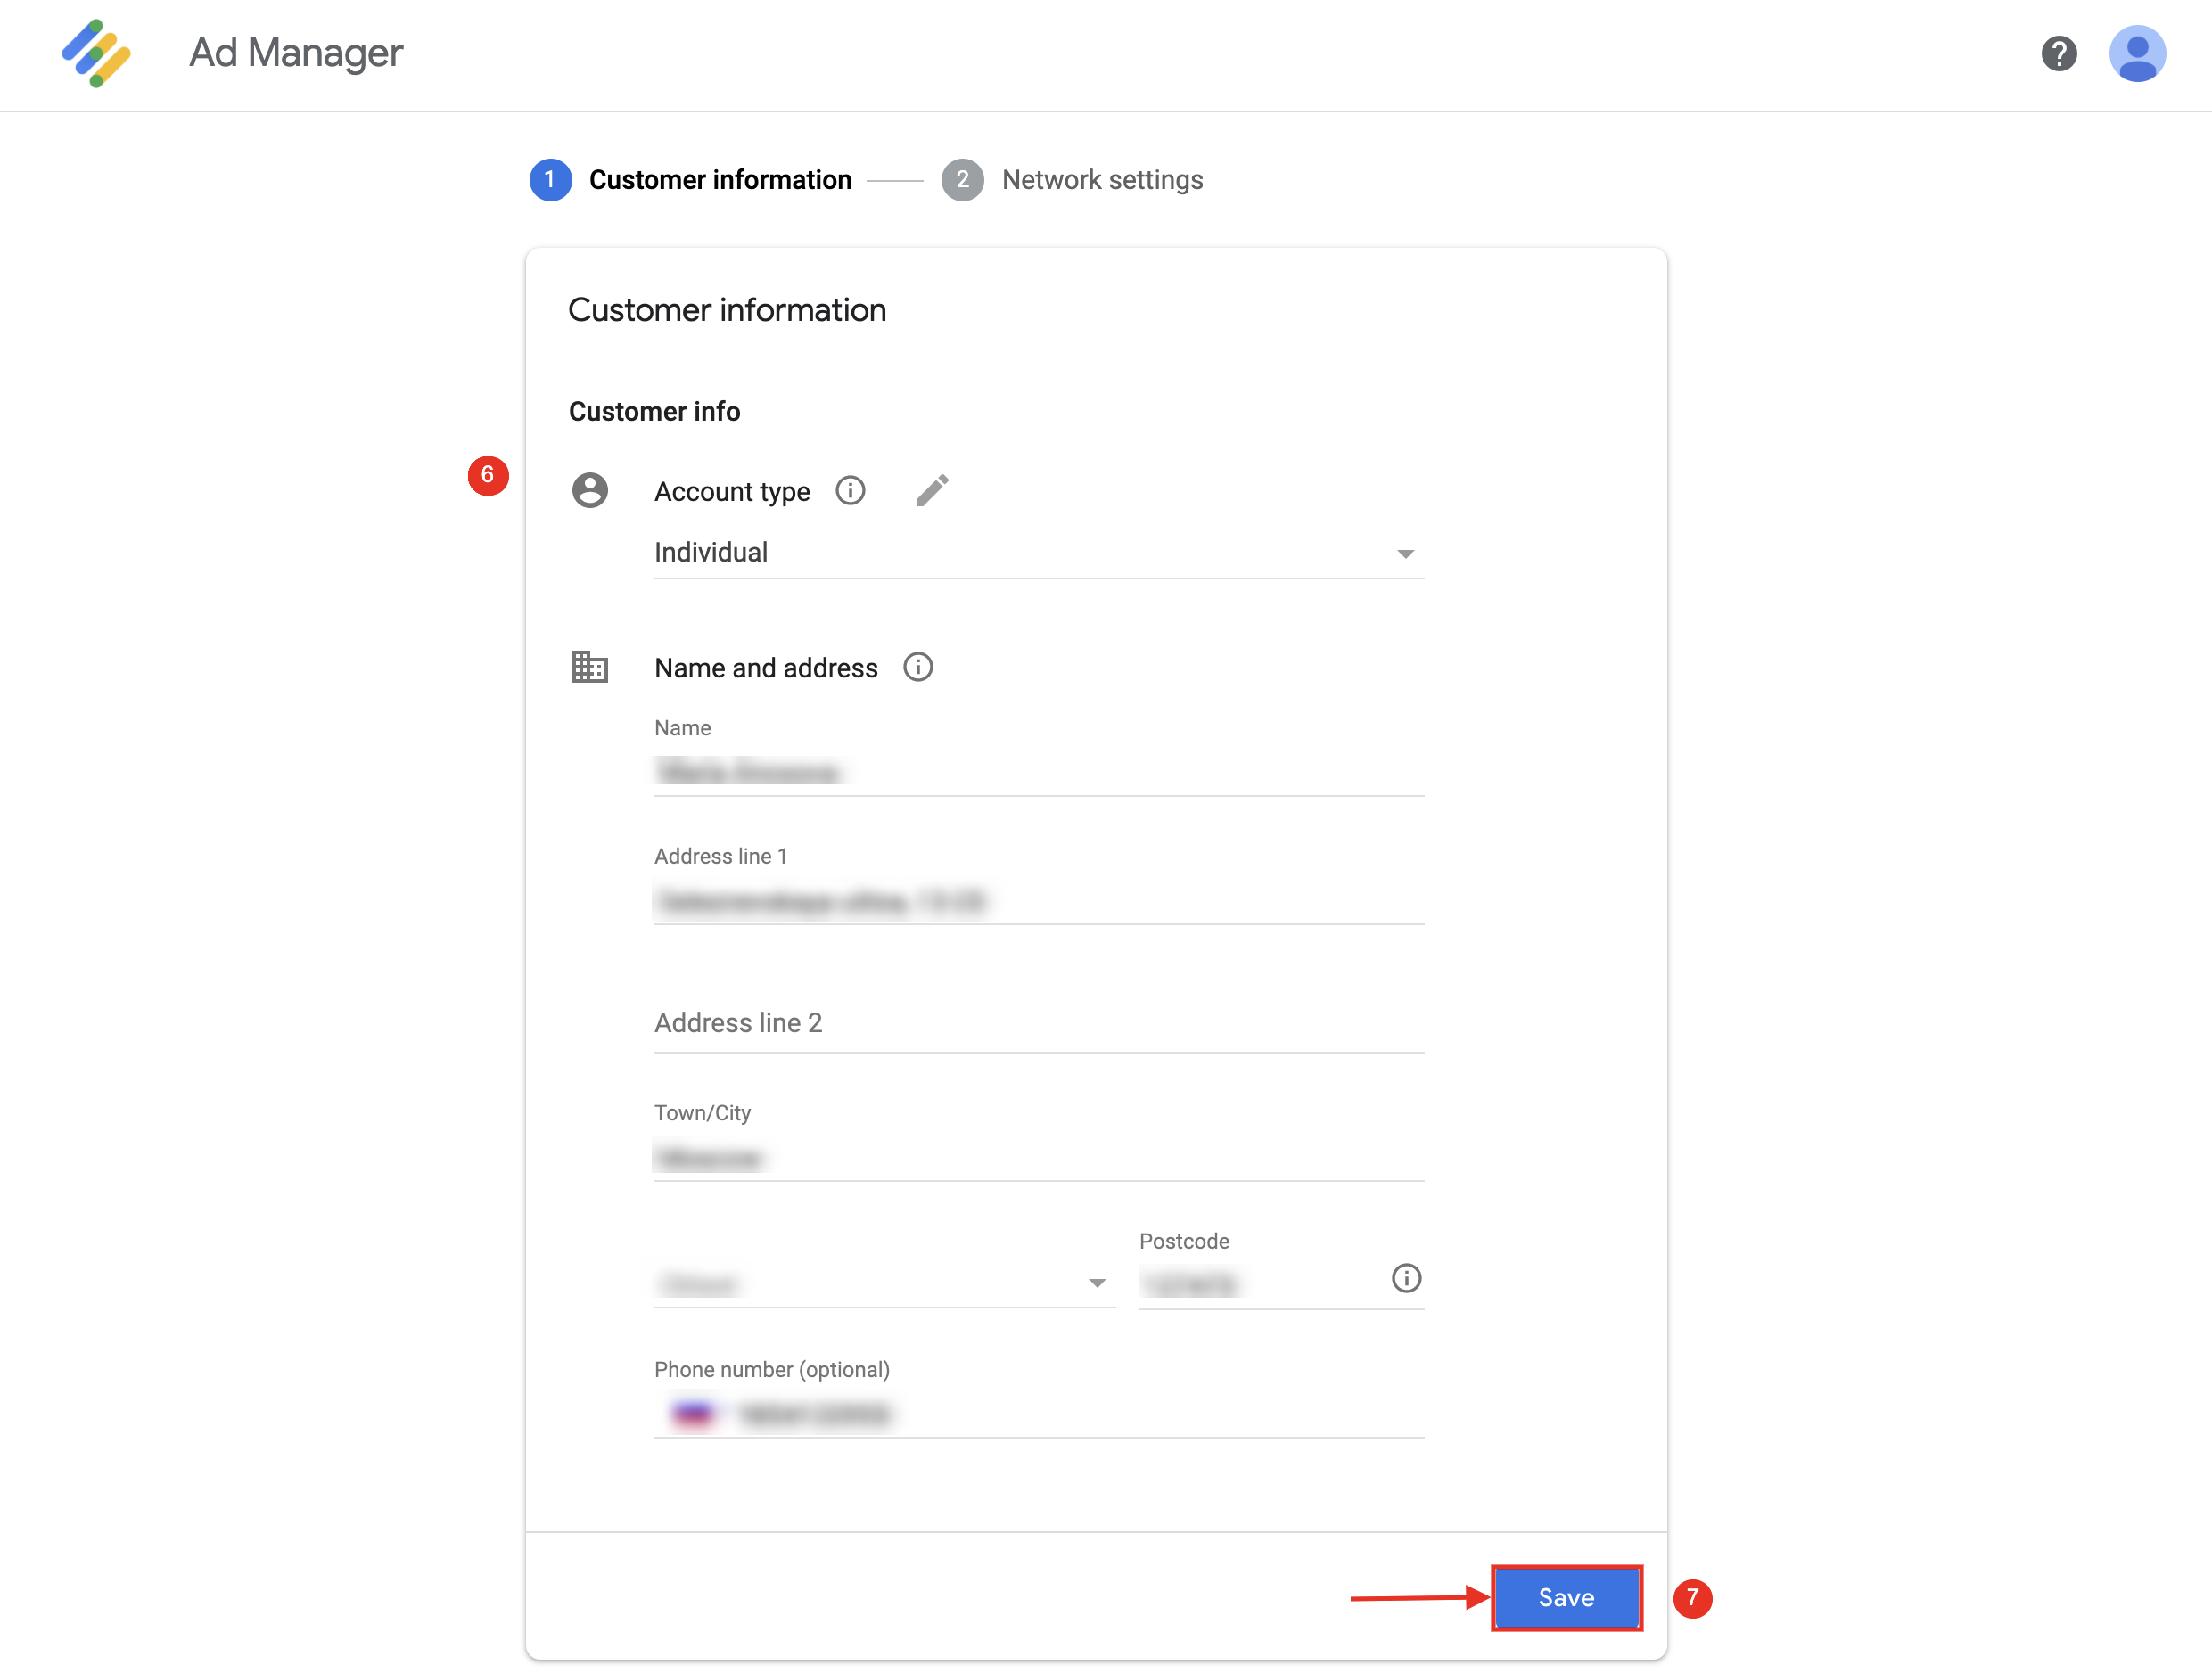
6. Review and Update Customer Information: Check your customer information for accuracy. If necessary, create a new payment account
7. Click "Save".
8. Add Your Network Name: Provide a name for your network. This helps identify your account within the Ad Manager platform.
9. Select Time Zone: Choose the appropriate time zone for your account.
10. Select Account Currency: Select the currency you prefer for your account.
11. Click "Save".

Congratulations! Your Ad Manager Network account has been successfully created.
Next Steps:
1. Account Verification: Your newly created account will be submitted for moderation. Google typically verifies accounts within 24 to 48 hours. Keep an eye on your email for notification of account approval.
2. Registration with Clickio: Once your account is approved, Clickio will register your website with your Ad Manager network code. Ensure the ads.txt file is correctly installed on your site.
3. Start Monetizing: You can now begin monetizing your site with Clickio through MCM Manage Inventory. Explore the various monetization options available to optimize your revenue.
If you encounter any issues or have questions along the way, don't hesitate to reach out to our support team for assistance at support@clickio.com.