How to Implement Standard Clickio Ad Units in Google Ad Manager?
Use this step-by-step instruction to correctly set up Standard Clickio ad units in your Google Ad Manager account.
For Dynamic Clickio ad formats (e.g. Smart Banner, Horizontal Sticky, Vertical Sticky, Splashscreen, Floater, High-Viewability Header, etc.), please refer to the separate instruction available at the following link.
Step 1: Create a Line Item
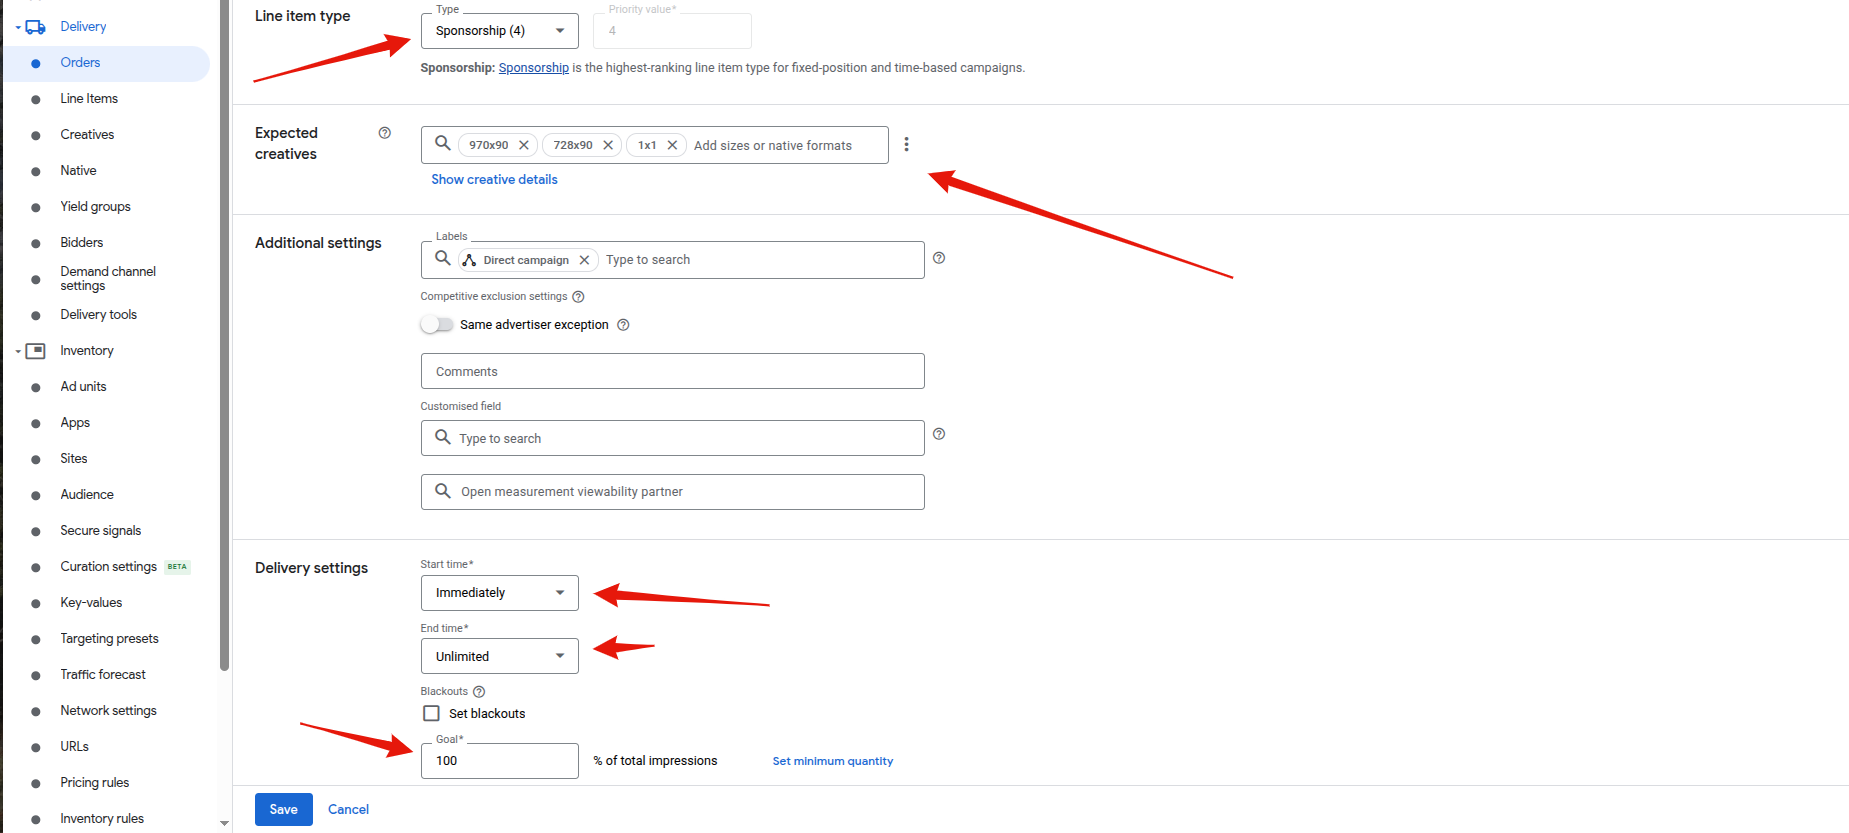
Set up a new line item for the Clickio tag. Ensure the following fields are correctly filled:
- Targeting Sizes: In the "Expected creatives" section, add all the ad sizes you want the Clickio tag to be served on (e.g., 300x250, 728x90), also add the size 1x1
- Line item type: Sponsorship (4)
- Start time: Immediately
- End time: Unlimited
- Goal: 100%
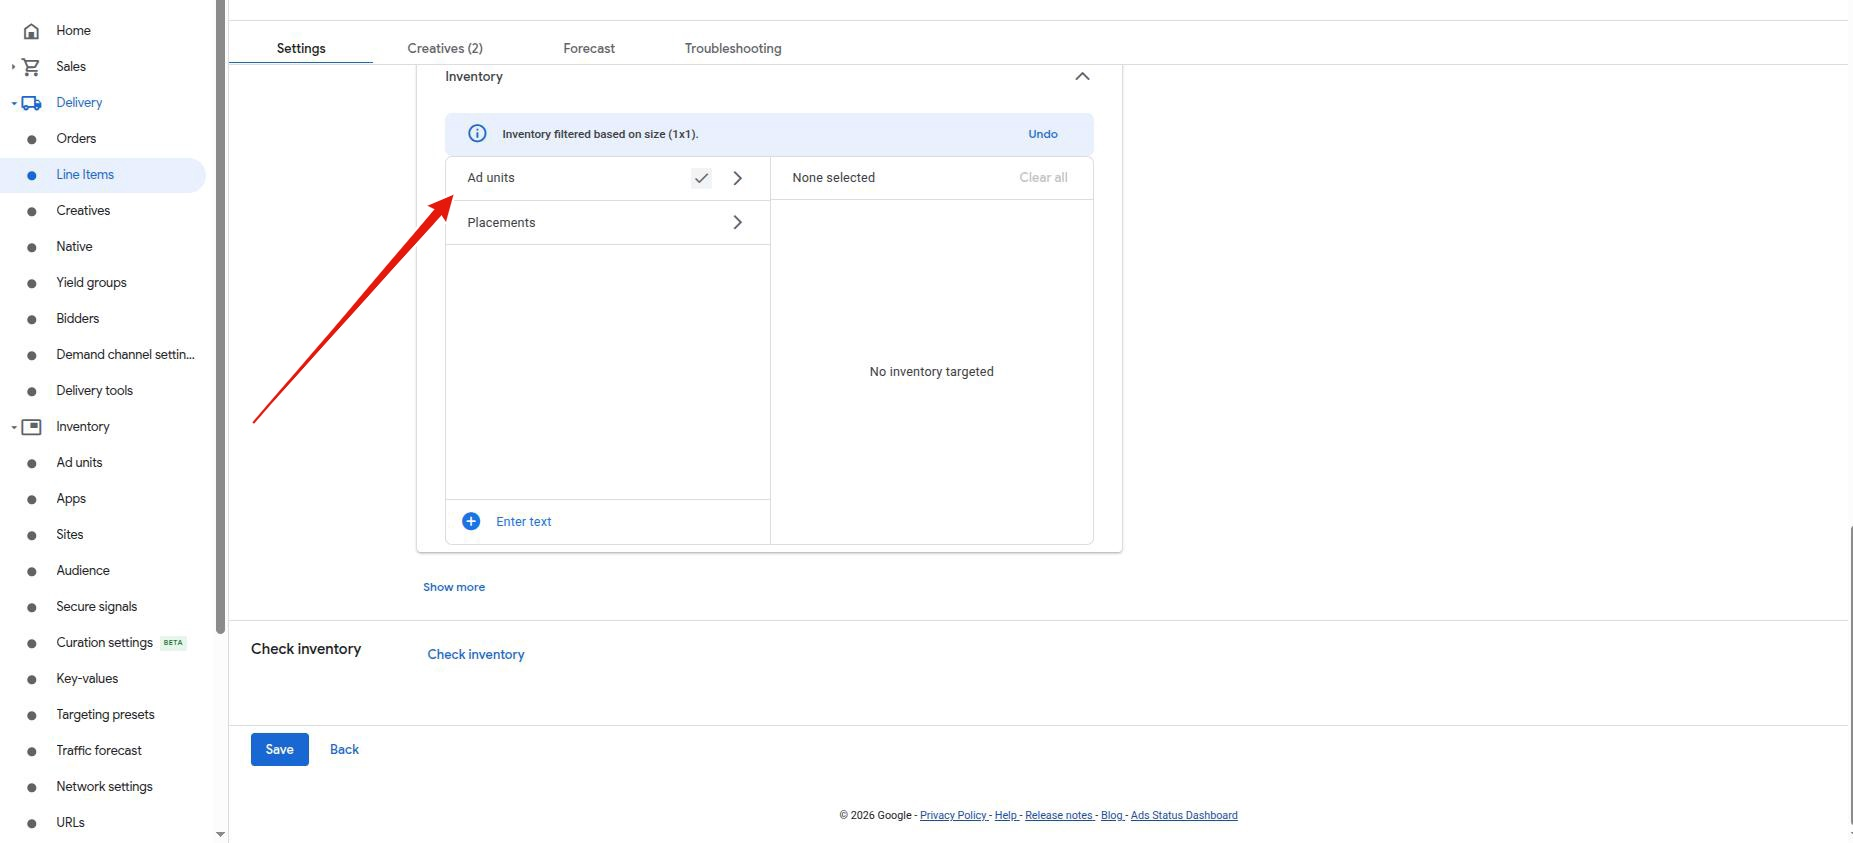
- Targeting: Assign it to the ad unit where you want our ads to be shown
Alternatively, in case you serve direct campaigns on the same inventory, you can use the following settings:
- Line item type: Price Priority (12)
- Start time: Immediately
- End time: Unlimited
- Goal: None
- Rate: Adjust it according to your needs and the distribution of direct campaign line items, but do not set it too low to prevent programmatic demand from taking control. A recommended range is 50 to 100 USD or the equivalent in your network’s currency.

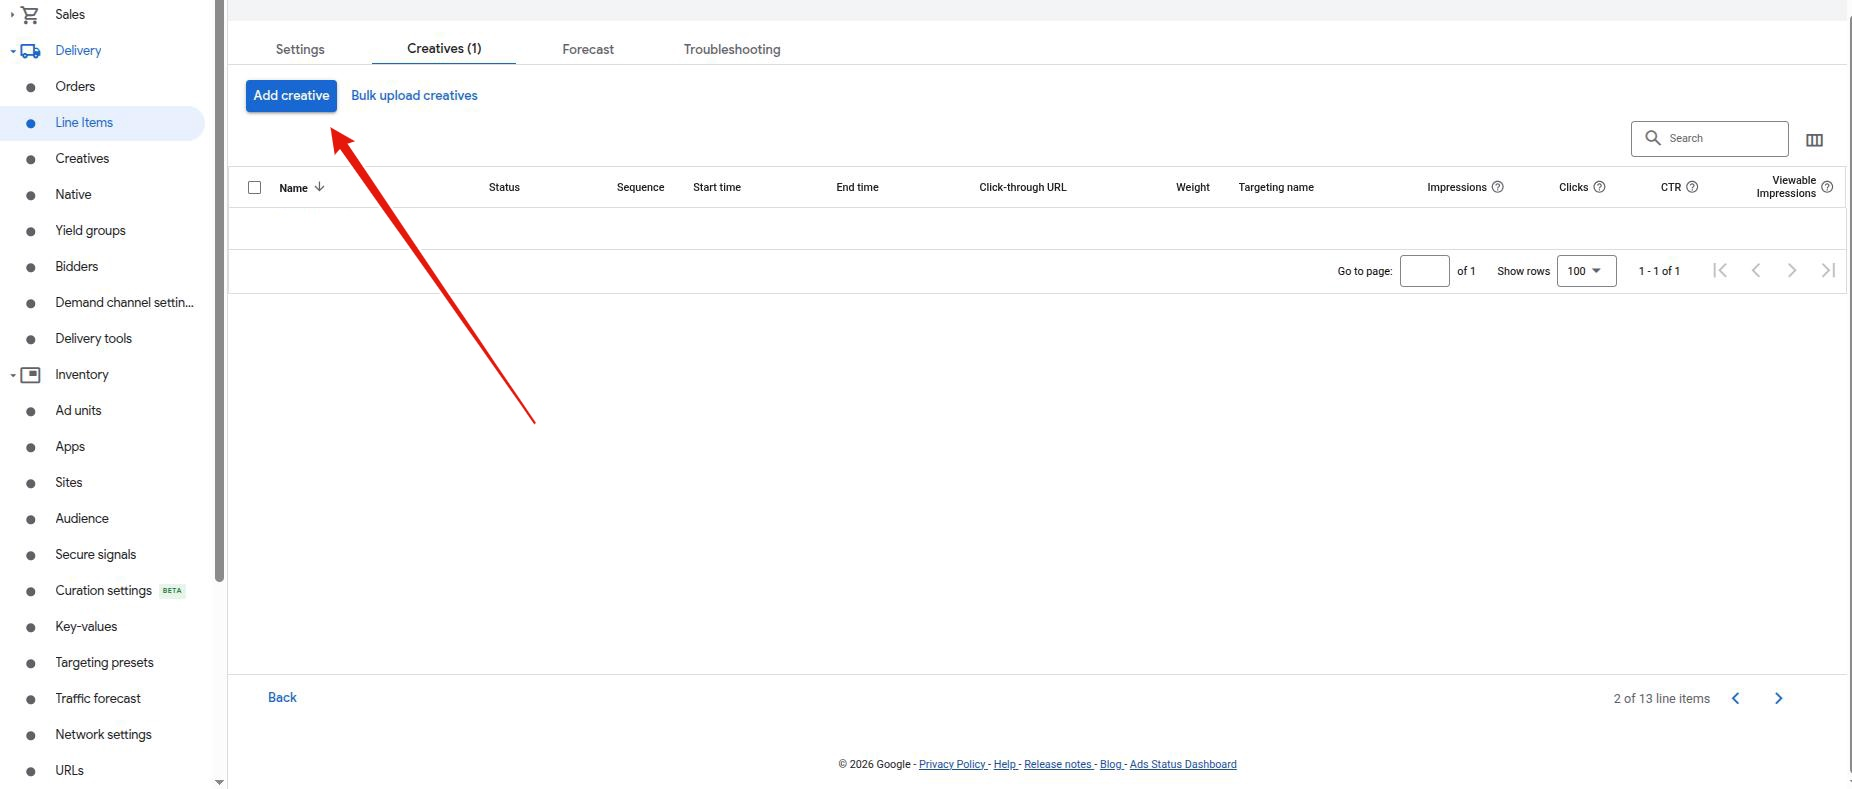
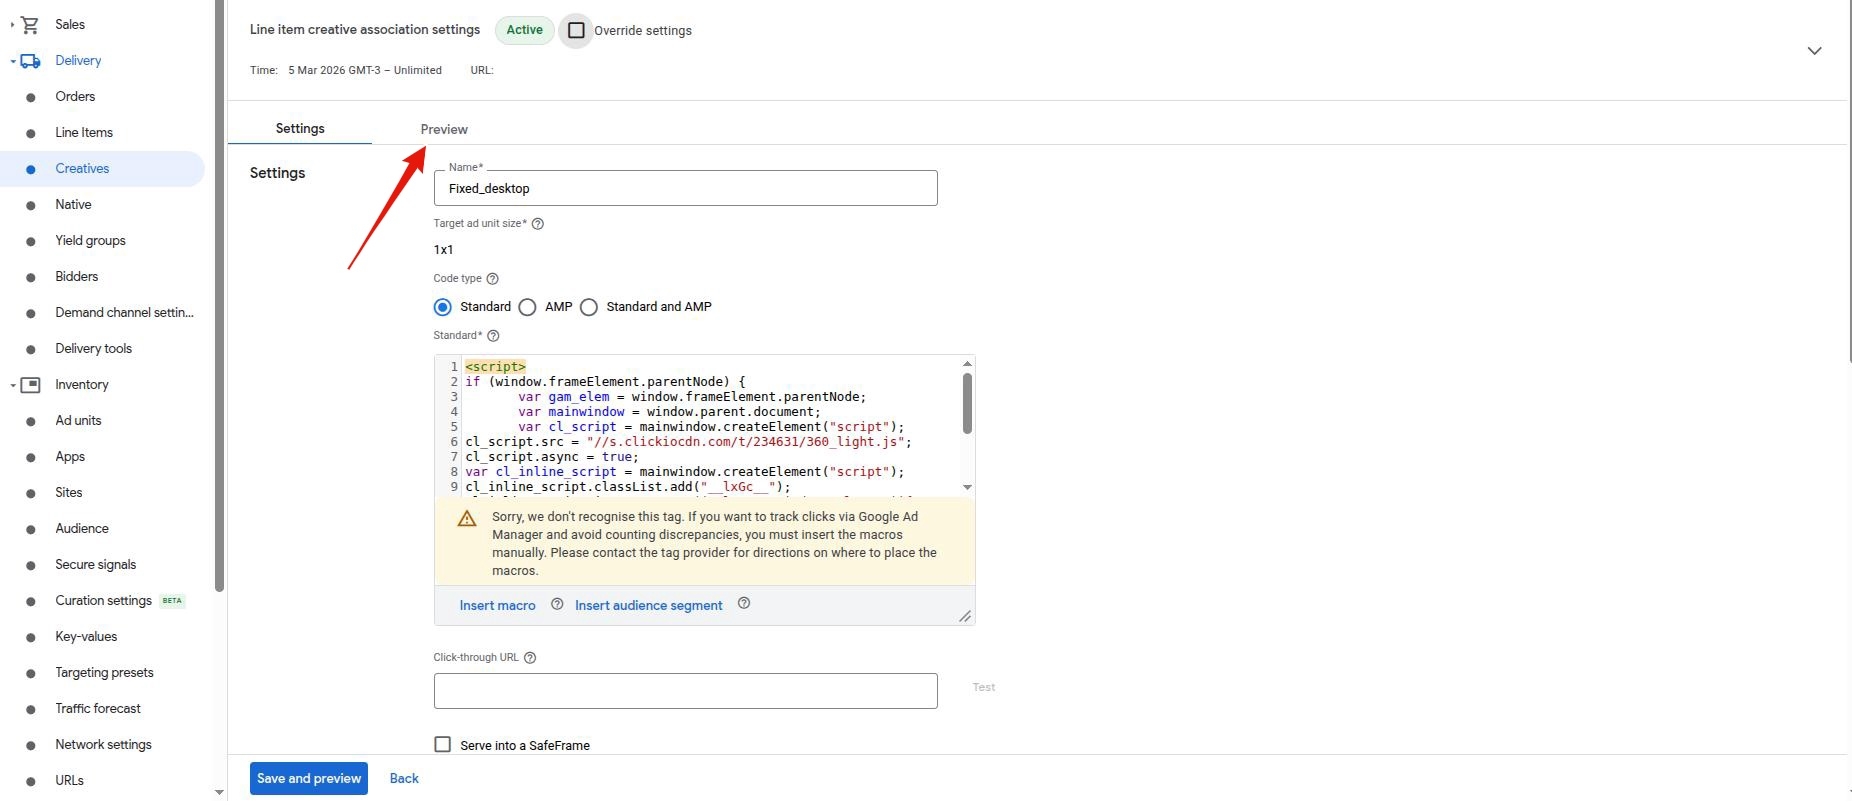
Step 2: Add a Third-Party Creative
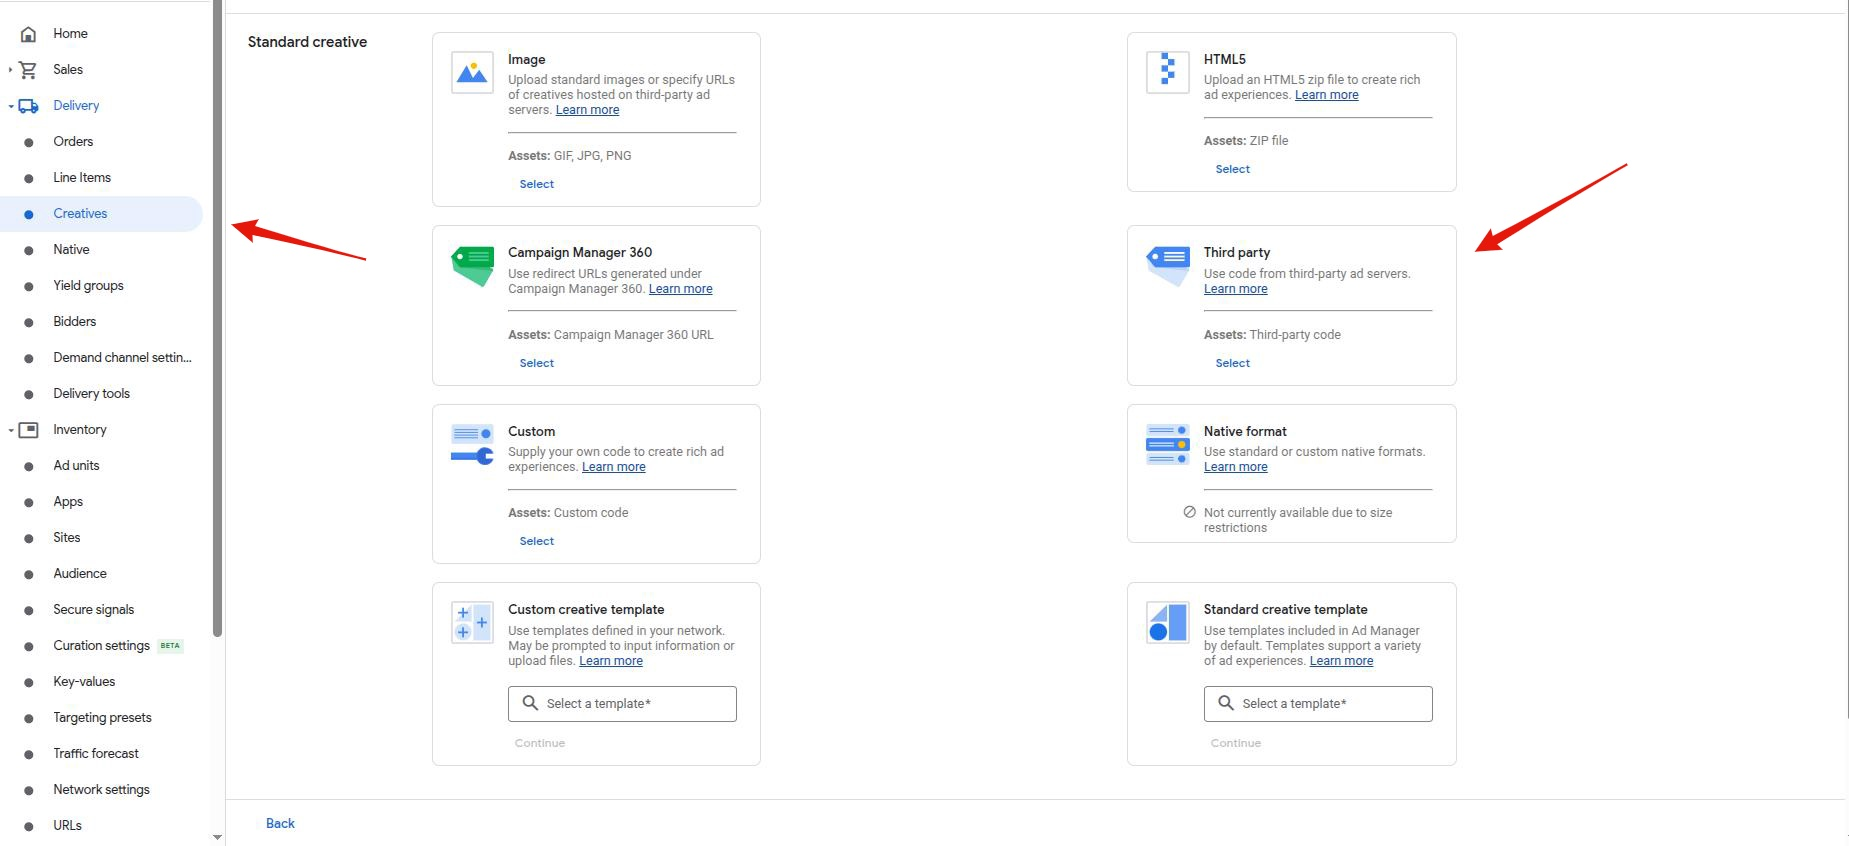
- Inside the line item, go to the Creatives tab and select Add creative > New creative (choose 1x1 from the list) > Third party.
- Target ad unit size: Select 1x1 as the Target ad unit size.
Step 3: Insert the Clickio Tag
- Go the Clickio Platform, select the ad unit, under Implementation tab choose GOOGLE AD MANAGER.
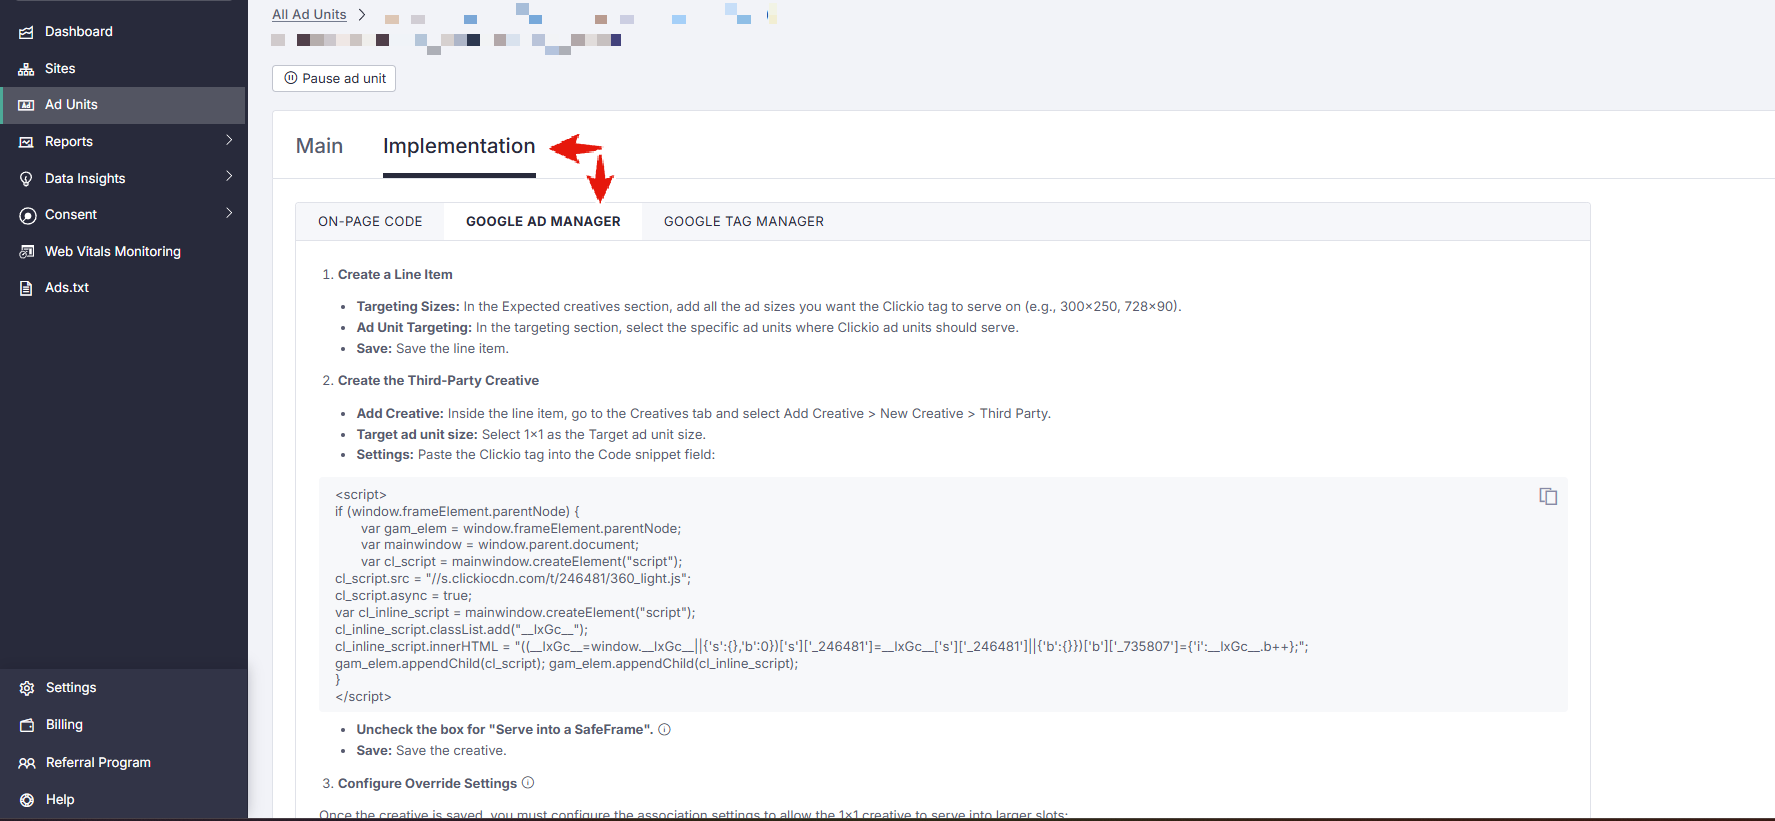
- Paste the Clickio tag into the third-party creative in your Google Ad Manager.
- Under creative settings, disable the option "Serve into a SafeFrame".
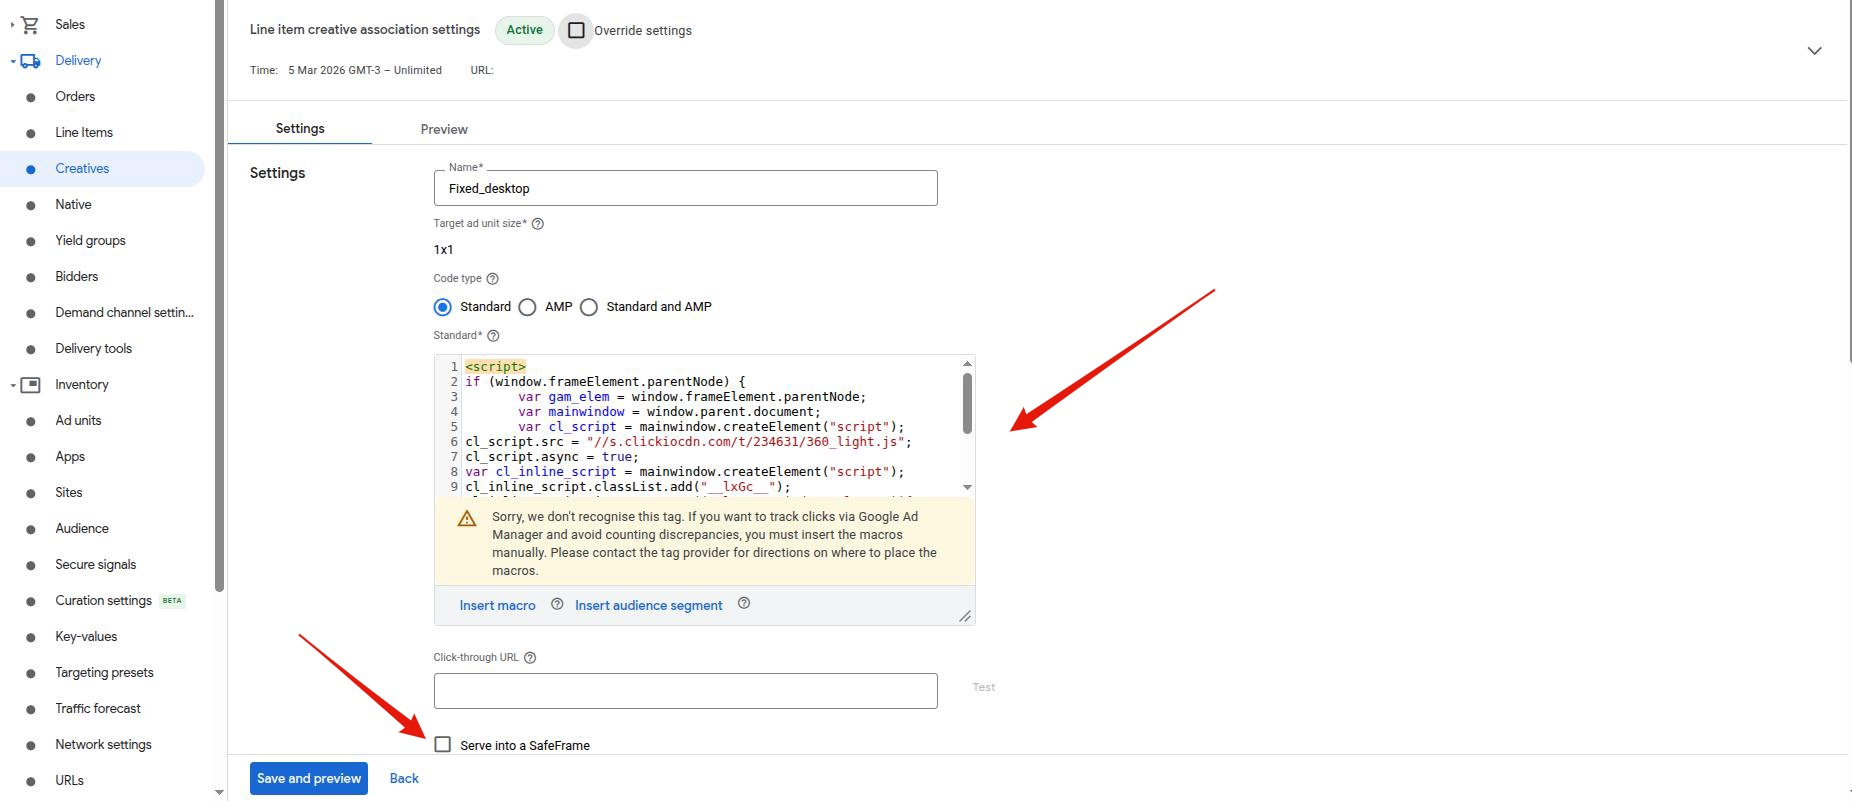
The notification “Sorry, we don't recognize this tag” appears as Google Ad Manager doesn’t recognize Clickio JavaScript code. The notification is not critical and can be ignored.
- Save settings.
Step 4: Configure Override Settings
Clickio creative is rendered outside the Google Ad Manager iframe to improve performance and increase revenue. The 1x1 size is required to serve this purpose and avoid leaving behind ghost iframes on the page. Creative overrides allow the 1x1 creative to be served in larger ad slots, ensuring the Clickio tag is delivered correctly.
After the creative is saved, it is necessary to set up size overrides to be able to serve the 1x1 creative previously created into larger slots (e.g., 300x250, 728x90):
- In the Line Item’s Creatives tab, click on the name of the creative you just created.
- Enable Overrides: Check the box for "Override settings" at the top of the page. In the Line Item’s Creatives tab, click on the name of the creative you just created.
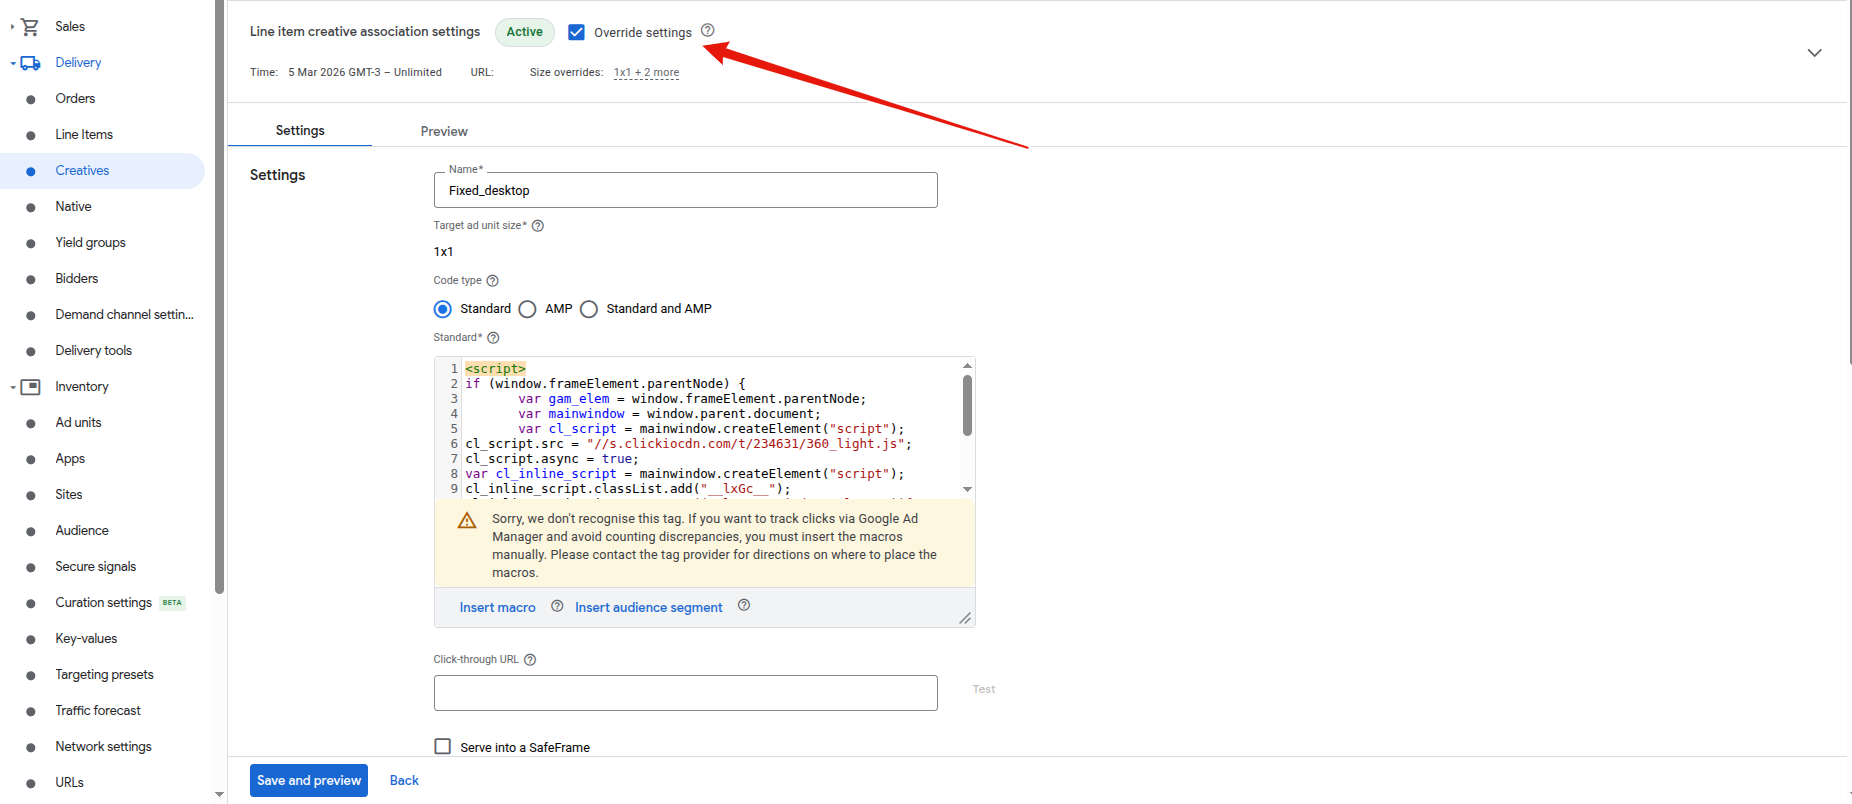
- Set Size Overrides: In the Size overrides field that appears, select all the ad sizes you targeted in the line item (e.g., 300x250, 336x280) including 1x1 size. This way although the creative target is 1x1 it will be able to serve those larger sizes.
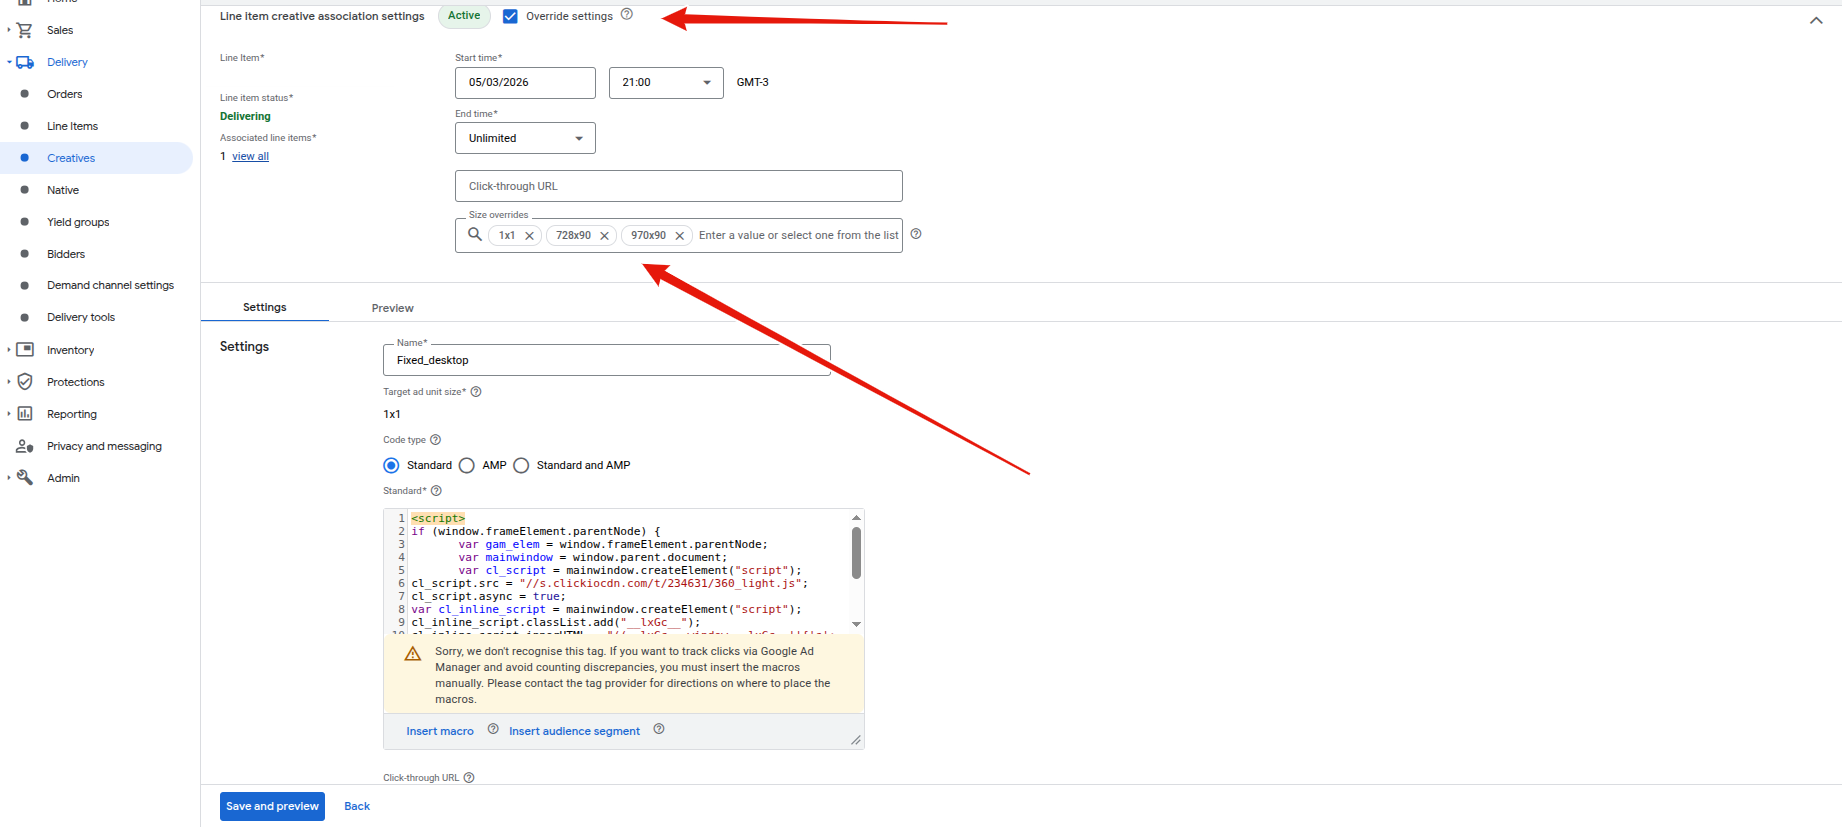
- Save: Click Save at the bottom of the page.
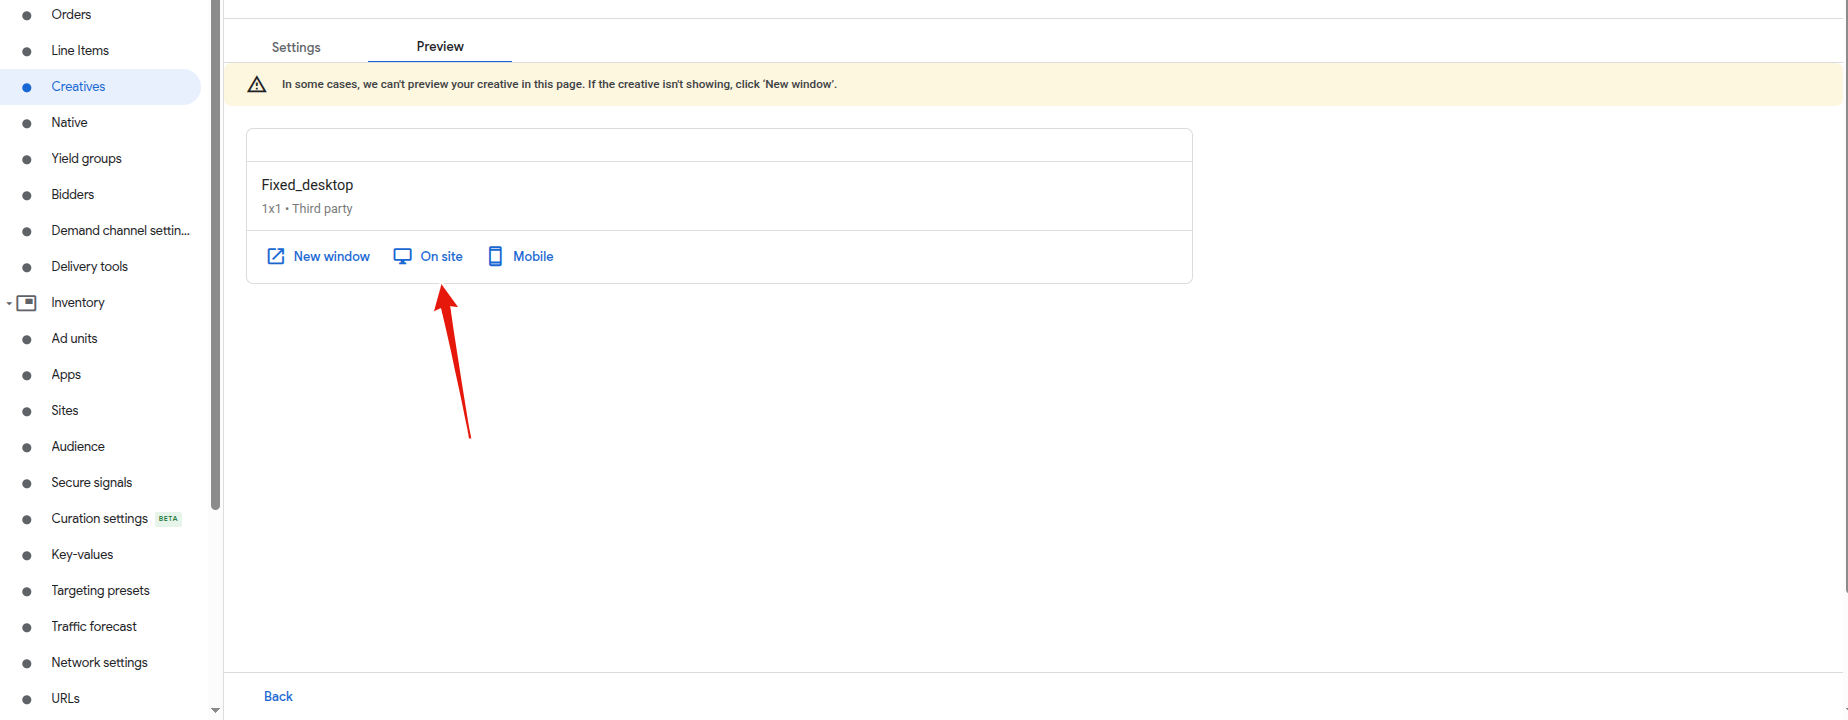
Step 5: Test Setup
You can obtain a test URL for the Clickio creative and send it to your account manager or Clickio Support so we can check your setup before going live.
1. Go to the Creatives Tab
- Once inside the line item, click the Creatives tab at the top of the page.
- You will see a list of creatives associated with that line item. Click on the Name of the creative you want to test.
2. Open the Preview Tool
- In the creative settings, click the Preview tab.
The "On site" tab is usually the most accurate for testing how the ad interacts with your actual website layout.
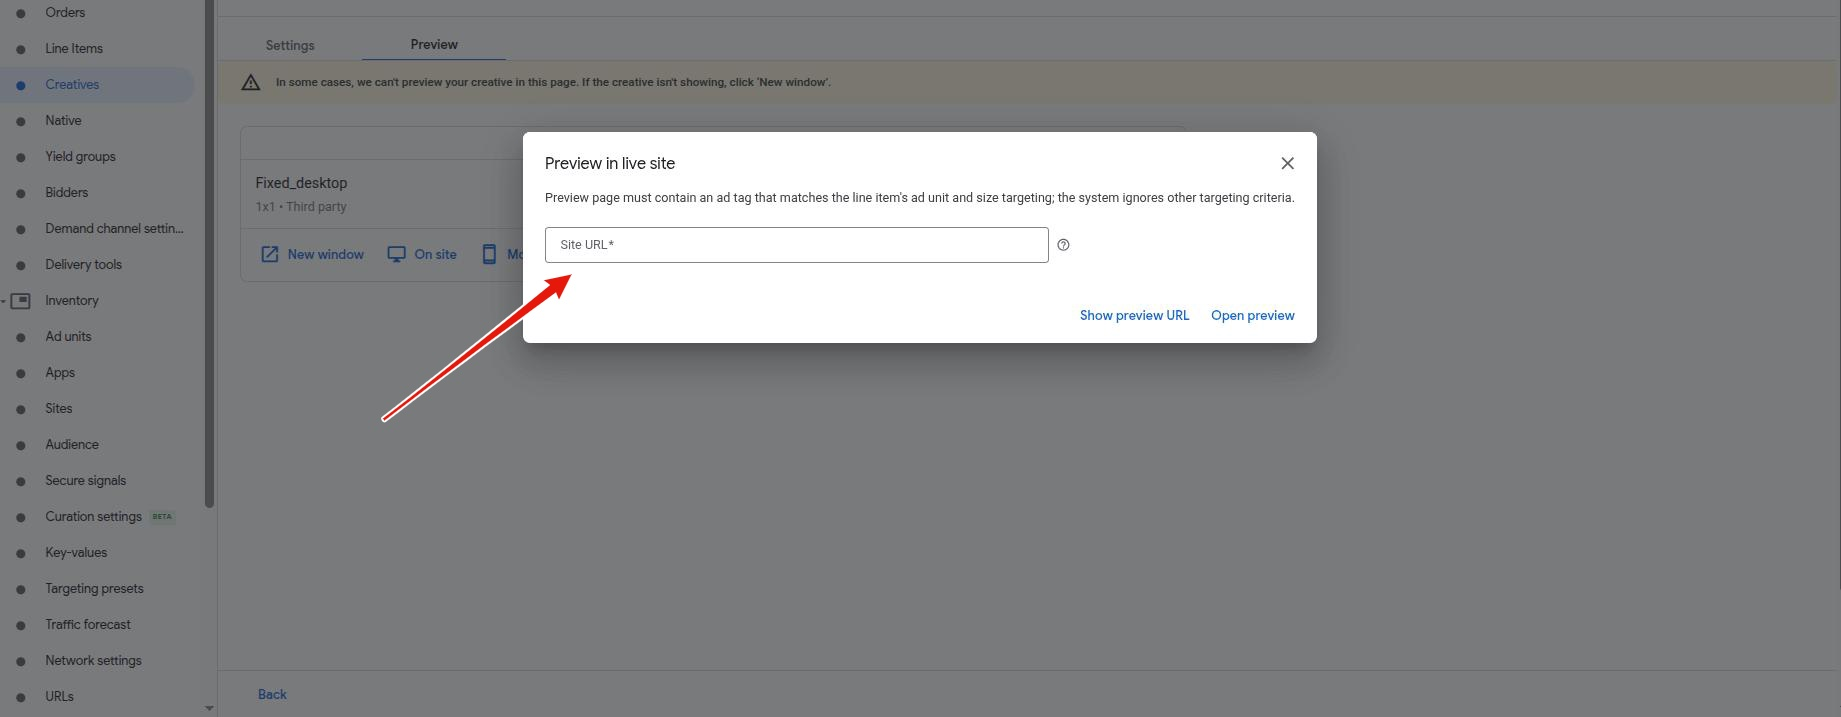
3. Generate the "On Site" Preview URL
- Click the "On site" tab.
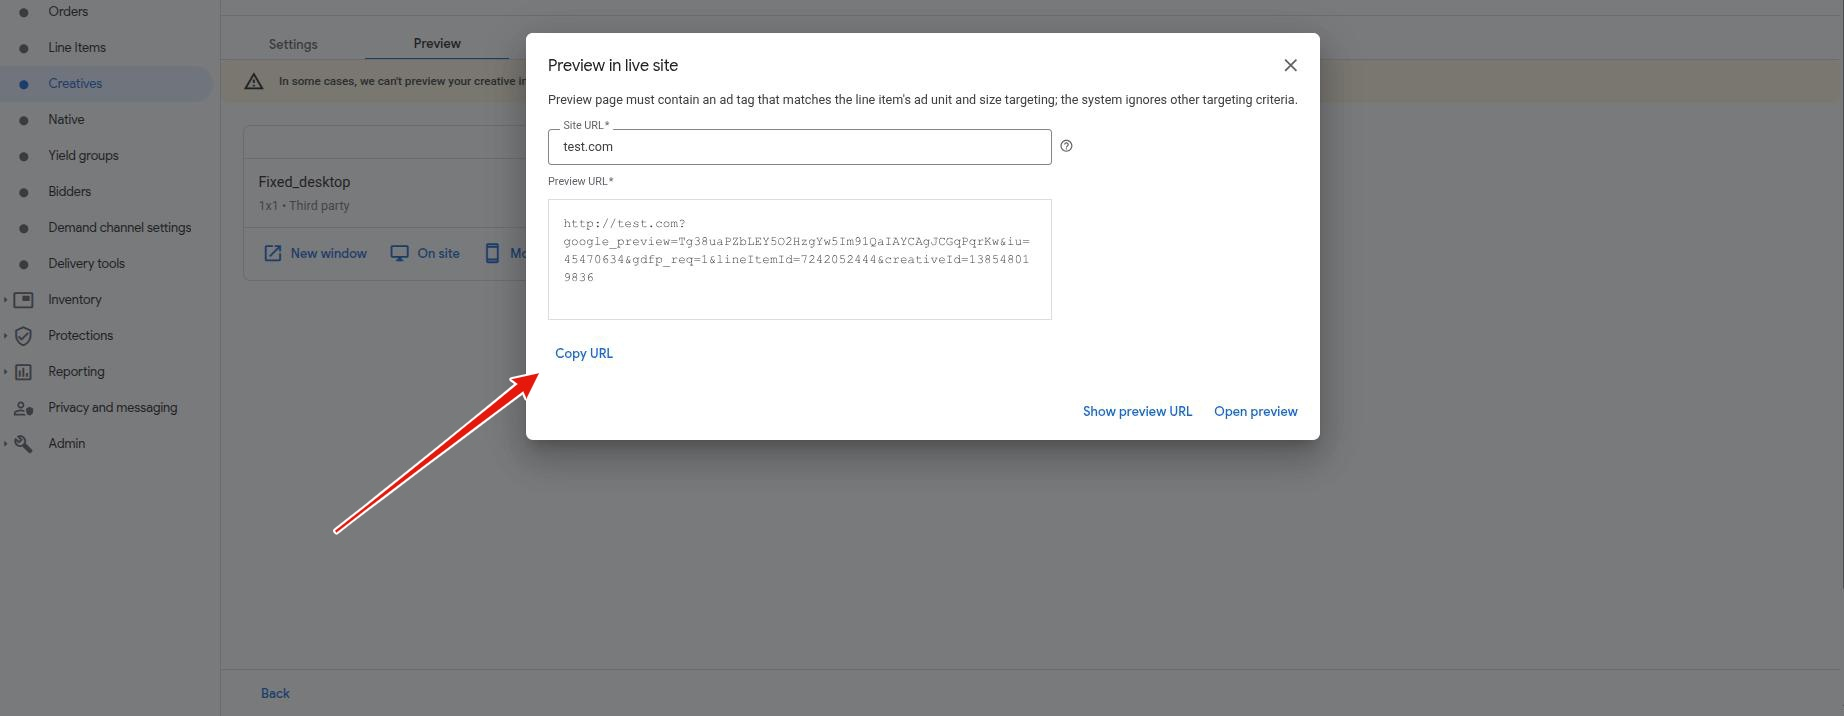
- Site URL: Enter the exact URL of the webpage where the ad is intended to appear and click "Show preview URL".
- Click "Copy URL" and share it with us.
Step 6: Add Clickio as Ad Partner Technology
2. Check Creatives for Consent: Click "Add URLs" in the Check creatives for consent section.

3. Add Clickio URL: Add "clickiocdn.com" as a URL in the Ad partner URL field.

4. Click "Done" and then "Save".

Congratulations! Clickio tags have been successfully implemented in Google Ad Manager. Ad serving will start within 15-30 minutes.
Assistance with Implementation
- Contact Clickio Support: If you need further assistance or information, contact your Clickio account manager or email Clickio Support at support@clickio.com.
- Grant Clickio Access: For efficient troubleshooting, grant Clickio access to your Google Ad Manager account following the provided instructions.
-
Notify Account Manager: After granting access, notify your Clickio account manager.
-
Deactivate Clickio User: Once implementation is successful, deactivate the Clickio user by changing the status from Active to Inactive.