How to set up Google Analytics 4 for working with Clickio Prism?
Step 1: Provide access to the Clickio service account to collect data through the API
1. Go to the Admin page of your Google Analytics 4 account and choose the Property User Management panel in the Property window.

2. In the Property permissions window click the plus button and choose Add users.

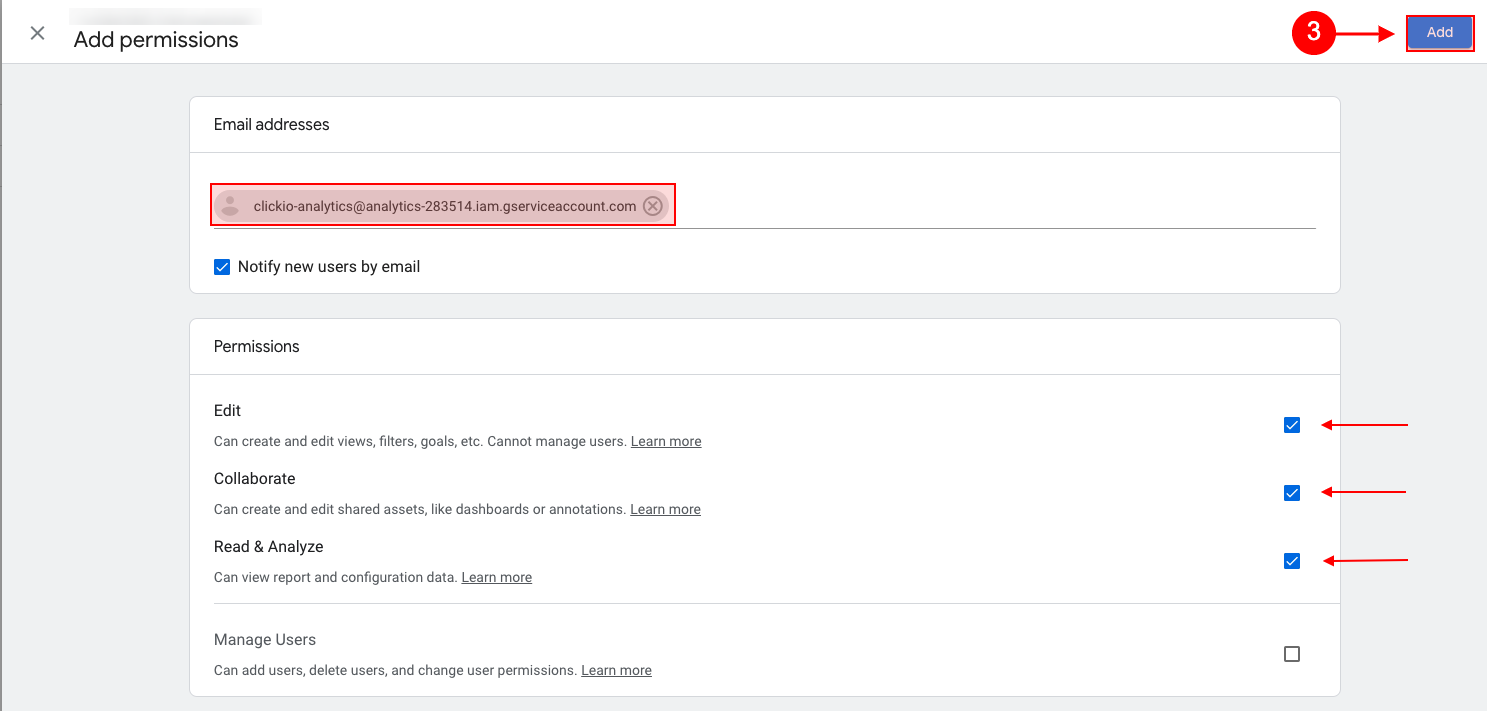
3. Type in clickio-analytics@analytics-283514.iam.gserviceaccount.com as email address, select Notify new users by email, mark three permission checkboxes (Edit, Collaborate, Read & Analyse) and click Add.
Step 2: Create a custom dimension in Google Analytics 4
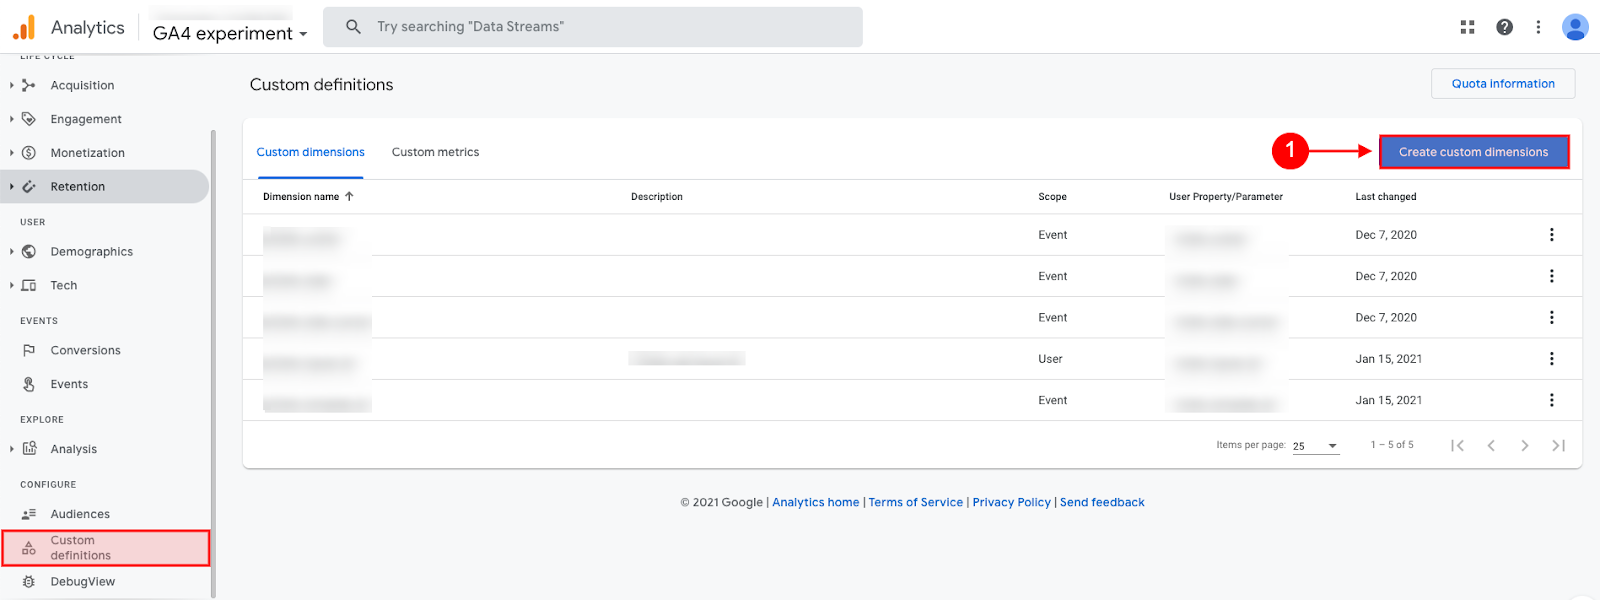
1. Go to the CONFIGURE > Custom Definitions page of your Google Analytics 4 account and click Create custom dimensions.
2. To create the first custom dimension, in the New Custom Dimension page, add the following information:
-
-
- Dimension name: clickio_data
- Scope: Event
- Event parameter: clickio_data
-
and click Save.

3.To create the second custom dimension, in the New Custom Dimension page, add the following information:
-
-
- Dimension name: clickio_action
- Scope: Event
- Event parameter: clickio_action
-
and click Save.

Step 3: Create a new Data Stream in Google Analytics 4
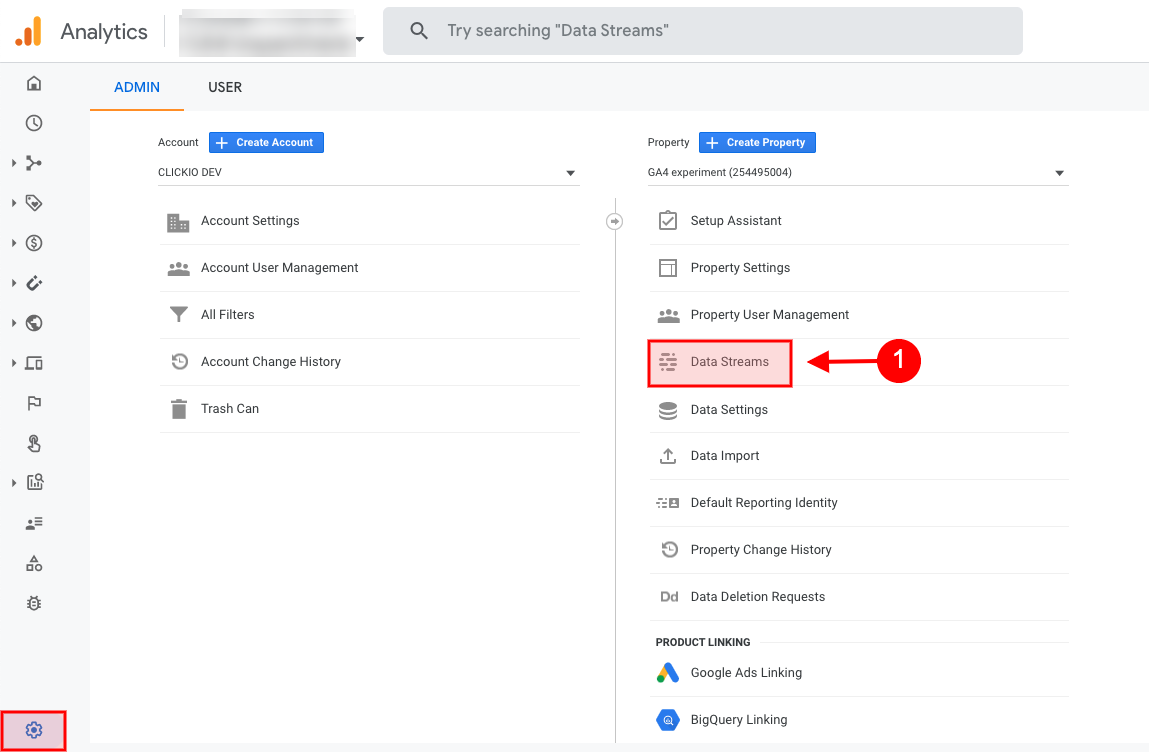
1. Go to the Admin page of your Google Analytics 4 account and choose the Data Streams panel in the Property window.
2. In the Data Streams window, click Add streams, and choose Web.

3. In the pop-up notice, click Yes.

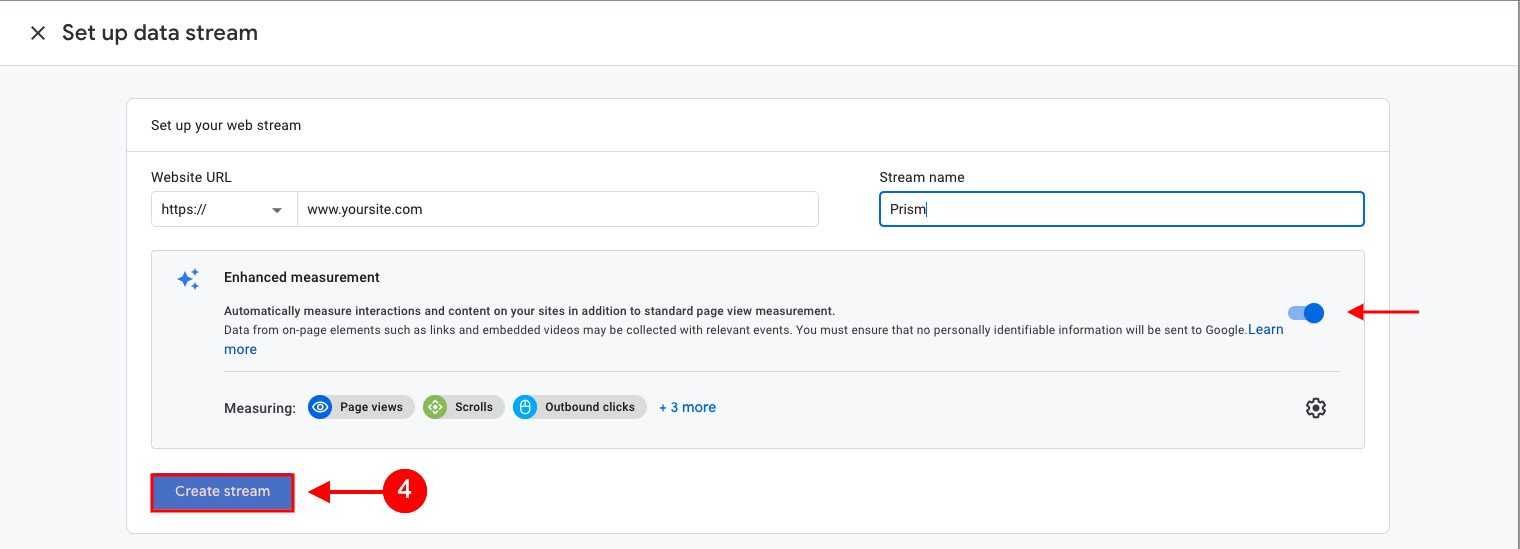
4. In the Set up your web stream window, add your website URL and name the stream you are creating "Prism". Be sure to enable the Enhanced measurement. Click Create stream.
5. Inform your Clickio manager about the created data stream by specifying the MEASUREMENT ID.
